How to Cook an Arm Roast: Easy Recipe and Cooking Times
To cook an arm roast, select a well-marbled piece weighing 3–5 pounds with minimal silver skin.
Pat it dry, season generously with kosher salt and pepper, then sear on all sides in a hot pan to develop a rich crust.
Transfer to a Dutch oven with aromatics and braising liquid, cover tightly, and roast low and slow at 250°F–300°F until the internal temperature reaches around 200°F for tender, shreddable meat.
Explore methods to refine seasoning, cooking, and leftovers for perfect results.
Key Takeaways
- Choose a well-marbled 3–5 pound shoulder arm roast with minimal silver skin and trim excess fat for even cooking and tenderness.
- Season generously with kosher salt, pepper, and complementary spices; pat dry before searing to develop a rich crust.
- Sear roast on all sides in a hot pan, then braise partially submerged in flavorful liquid at 250°F–300°F for 3–5 hours.
- Cook until internal temperature reaches 200°F–203°F for tender, shreddable meat, monitoring with a probe throughout.
- Let roast rest after cooking, then shred or slice against the grain and serve with pan juices or sauces.
What Makes Arm Roast Perfect for Slow Cooking?

Because the arm roast comes from the shoulder area, it contains a significant amount of connective tissue and collagen that requires slow, gentle cooking to break down properly.
When you cook it low and slow, typically between 250°F and 300°F, the collagen converts into gelatin. This tenderizes the meat and creates a rich, moist texture.
The dense muscle fibers benefit from extended braising or roasting times, allowing heat and moisture to penetrate evenly.
You’ll want to sear the roast first to develop a flavorful crust through the Maillard reaction. Then add liquid and aromatics for braising.
This method softens tough tissue without drying the meat, ensuring it becomes fork-tender and either shreddable or sliceable, depending on your final temperature target.
For best results, aim to monitor the internal temperature closely, targeting a pull temperature around 203°F to achieve optimal tenderness.
How to Choose the Best Arm Roast for Your Meal?
Achieving the perfect arm roast starts with selecting the right cut to match your intended cooking method and desired texture. Look for a well-marbled shoulder arm roast with visible intramuscular fat, as this guarantees tenderness and flavor during slow cooking.
Avoid roasts with excessive silver skin or large connective tissue deposits that won’t break down properly. Choose a roast weighing between 3 to 5 pounds for manageable cooking times and even heat penetration.
Inspect the color—it should be a vibrant deep red, indicating freshness. If you plan to braise, pick a roast with moderate fat and connective tissue for shreddable results.
For slicing, seek a smaller roast with less connective tissue and trim excess fat to avoid toughness. Proper selection directly influences cook time, texture, and final flavor.
Additionally, trimming excess fat and silver skin improves heat transfer and prevents uneven cooking for optimal results.
How to Season and Prep Your Arm Roast for Maximum Flavor?
To kick things off, grab some coarse salt and freshly ground black pepper. You’ll want to season your arm roast evenly with these, as they really help the flavor sink in. Before you get to searing, make sure to pat the roast dry. This little step is key for achieving that nice, uniform crust we all love.
Next, let’s talk about your Dutch oven. Preheat it to get it nice and hot—that’s where the magic happens with the Maillard reaction. It’s what gives your roast that beautiful, rich color and flavor.
Now, don’t forget about the aromatics! Toss in some garlic cloves, bay leaves, and sprigs of rosemary into the braising liquid. These will subtly infuse the meat with delicious flavors as it cooks slowly. Trust me, your taste buds will thank you!
For the best results, insert a temperature probe into the thickest part of the roast to monitor internal doneness accurately throughout cooking.
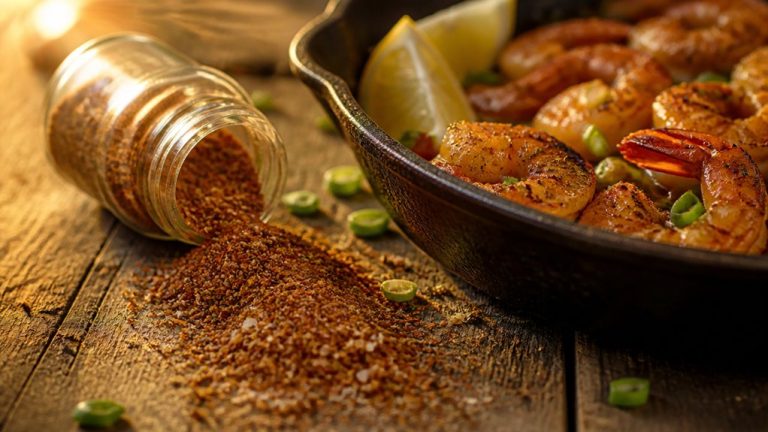
Choosing Seasoning Ingredients
Selecting the right seasoning for your arm roast is essential to enhance its rich, beefy flavor and complement the slow-cooked tenderness.
Start with coarse kosher salt and freshly ground black pepper. These fundamental seasonings penetrate the meat, balancing natural flavors.
Incorporate aromatics like garlic powder, onion powder, and dried herbs: thyme, rosemary, and bay leaves. Their volatile oils infuse during braising, amplifying complexity.
Avoid overpowering spices; subtlety preserves the roast’s character. For deeper umami, add smoked paprika or a touch of ground cumin, which stand up well to long cooking.
You’ll want to season generously; the connective tissue absorbs and melds flavors, so don’t skimp.
Keep your seasoning blend balanced and suited to the braising liquid to ensure a harmonious final dish.
For optimal tenderness, consider the ideal internal temperature to guide your cooking process for arm roast.
Pre-Searing Preparation Steps
Before searing your arm roast, make sure the surface is thoroughly dried using paper towels to promote ideal browning and crust formation.
Moisture inhibits the Maillard reaction, reducing flavor development. Next, follow these key steps for seasoning and prepping:
- Generously season all sides with kosher salt and freshly ground black pepper to enhance natural beef flavors and aid crust formation.
- Optionally, lightly coat the roast with a thin layer of oil to improve heat conduction and prevent sticking during searing.
- Allow the roast to rest at room temperature for 30 to 45 minutes to guarantee even cooking and better sear.
- Prepare your searing pan by preheating it over medium-high heat until it’s smoking slightly for immediate, consistent contact.
Using an oil with a high smoke point for coating can help achieve a better sear without burning the oil.
These technical steps maximize flavor and texture before braising or slow roasting.
Incorporating Aromatics Effectively
Once your arm roast is properly seared and rested, layering aromatics around it releases complex flavor profiles during braising or roasting.
Start by arranging quartered onions, smashed garlic cloves, and fresh herbs like thyme and rosemary around the roast. Bay leaves add subtle earthiness, while peppercorns contribute mild heat.
Use whole aromatics rather than chopped to prevent overpowering the meat. When adding liquid—beef broth or tomatoes—ensure it partially submerges the roast, allowing aromatics to infuse the cooking liquid evenly.
Maintain a tight lid to trap steam, which extracts and circulates aromatic compounds. This method enhances depth and balance in the final dish, complementing the arm roast’s connective tissue breakdown.
Proper aromatic incorporation is essential for achieving maximum flavor complexity and a richly layered braise.
For optimal flavor and tenderness, consider searing after cooking as an optional finishing step to enhance the roast’s crust and juiciness.
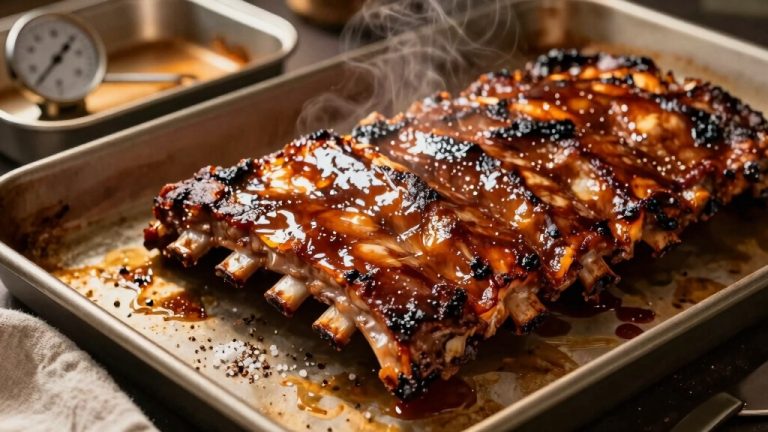
Braising and Oven Roasting Methods for Arm Roast
You’ll kick things off by searing the arm roast. This step is key because it helps develop a rich, flavorful crust.
Once that’s done, it’s time to add your braising liquid—think broth or drink—into a Dutch oven.
Now, cover it up and pop it in the oven at a low temperature, somewhere between 250°F and 300°F. This is where the magic happens! Cooking it slowly allows those tough connective tissues to break down beautifully.
The result? Melt-in-your-mouth beef that’s not only tender but also packed with deep, concentrated flavors. Trust me, you’ll be glad you took the time to do it right!
For best results, always monitor the internal temperature closely to ensure perfect meat tenderness throughout the cooking process.
Braising Techniques Overview
Although arm roast contains tough connective tissue, braising and low-temperature oven roasting transform it into tender, flavorful meat by breaking down collagen over extended cooking times.
Braising typically starts with searing the roast on all sides until browned, locking in flavor. Then, you add a flavorful liquid—beef broth, drink, or tomatoes—just enough to cover halfway.
Cover the pot tightly to trap moisture and transfer it to a low oven. Maintain a steady temperature around 275°F for 3 to 5 hours, allowing the connective tissue to dissolve.
Key braising steps include:
- Sear roast thoroughly to develop a crust.
- Add aromatics and deglaze the pan to capture fond.
- Submerge roast partially in liquid for even cooking.
- Cover and braise slowly until fork-tender and 200°F+ internally.
Maintaining a stable cooking temperature during braising helps ensure even collagen breakdown and prevents drying out the meat.
Low Temperature Roasting
When preparing an arm roast using low temperature roasting, controlling the oven’s heat between 250°F and 300°F allows the tough connective tissue to gradually break down, resulting in tender, flavorful meat.
Begin by seasoning the roast and searing it thoroughly to develop a rich crust through the Maillard reaction. Next, add aromatics and deglaze the pan with broth or drink to capture fond.
Cover the roast tightly with a lid or foil to maintain moisture during the slow cook. Roast for 3 to 5 hours, depending on size, monitoring internal temperature until it reaches 200°F to 203°F for peak tenderness.
This method softens collagen into gelatin, ensuring a succulent texture ideal for shredding or slicing. Rest the roast before serving to retain juices. For enhanced smoky flavor, consider using hickory wood during roasting to impart a mild, bacon-like aroma that complements beef well.
Slow Cooker and Smoke-Then-Braise Methods for Arm Roast
Harness the convenience of a slow cooker to transform an arm roast into tender, flavorful meat with minimal hands-on time.
Begin by seasoning and searing the roast to develop a crust.
Place it in the slow cooker with aromatics and enough braising liquid, such as beef broth, drink, or tomatoes, to cover halfway.
Cook on low for 8-10 hours until fork-tender.
Alternatively, use the smoke-then-braise method to enhance flavor complexity:
- Smoke the roast at 225°F for 2-3 hours to infuse smoky depth.
- Transfer to a braising liquid in a covered pot.
- Braise in the oven at 275°F for 3-4 hours until tender.
- Rest before shredding or slicing to retain juices.
Both methods leverage slow, moist heat to break down connective tissue most effectively. Maintaining a consistent temperature control during cooking is key to achieving tender, flavorful results.
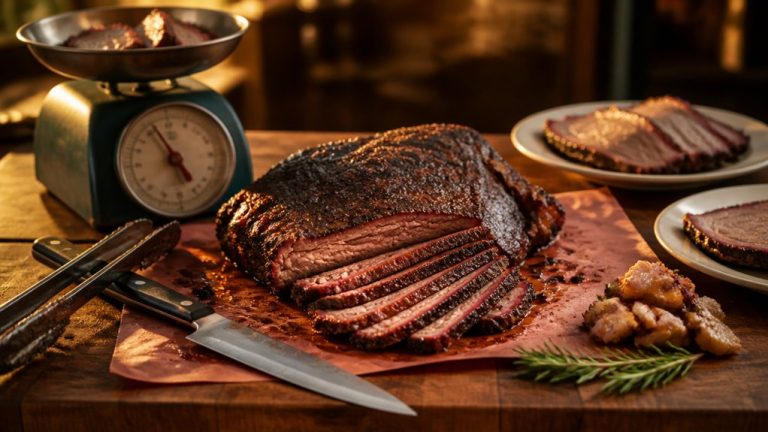
How to Serve Arm Roast for Delicious Meals?
You’ll find that serving arm roast is most successful when you match the preparation style to the desired texture. Braised roasts shred easily, while those cooked for slicing require careful temperature control.
For braised arm roast, let the meat rest briefly after cooking. Use two forks to shred along the grain. Serve over mashed potatoes, rice, or egg noodles, and spoon reduced pan juices with softened onions as a finishing sauce.
If you’ve cooked a sliceable roast at medium-rare, slice thinly against the grain to maximize tenderness. Arrange slices neatly on warmed plates and drizzle with au jus or pan juices to maintain moisture.
In both cases, ensuring proper resting preserves juiciness and enhances flavor. This makes each serving consistently delicious.
Storing and Using Leftover Arm Roast
Properly storing leftover arm roast preserves its flavor and texture for future meals. After cooking, let the roast cool to room temperature for no more than two hours to prevent bacterial growth.
Allow cooked arm roast to cool no longer than two hours to keep its flavor and prevent bacteria.
Slice or shred the meat based on your intended use, then package it airtight using vacuum-sealed bags or airtight containers to minimize oxidation and moisture loss. Refrigerate at or below 40°F for up to four days or freeze at 0°F for up to three months.
To maximize your leftovers:
- Reheat gently using low heat or a steam method to maintain moisture.
- Incorporate shredded roast into sandwiches, stews, or pasta.
- Use pan juices or broth to rehydrate and flavor the meat.
- Avoid multiple reheating cycles to preserve tenderness and safety.
Frequently Asked Questions
Can I Freeze an Uncooked Arm Roast?
Yes, you can freeze an uncooked arm roast.
Wrap it tightly in plastic wrap, then seal it in a heavy-duty freezer bag or vacuum-seal it to prevent freezer burn.
Label with the date and use within 4 to 12 months for best quality.
When ready, thaw it slowly in the refrigerator for 24-48 hours before cooking to ensure even defrosting and maintain texture and flavor integrity.
How Long Should I Rest the Roast After Cooking?
Think of resting your roast as letting a symphony settle after the final note.
You should rest it for at least 15 to 20 minutes after cooking to allow the juices to redistribute evenly.
This pause guarantees the connective tissues relax, locking in moisture and enhancing tenderness.
Cover it loosely with foil to retain warmth without steaming.
Skipping this step risks dry meat and uneven texture, so don’t rush the essential resting phase.
What Side Dishes Pair Best With Arm Roast?
You’ll want to pair your arm roast with sides that complement its rich, braised flavors.
Creamy mashed potatoes or buttered egg noodles absorb the savory pan juices perfectly.
Roasted root vegetables like carrots, parsnips, and potatoes add texture and sweetness.
Steamed green beans or sautéed spinach offer a fresh, slightly bitter contrast.
Consider a robust reduction sauce alongside to elevate the depth of your meal.
Can I Cook Arm Roast in an Instant Pot?
Yes, you can cook arm roast in an Instant Pot.
Start by seasoning and searing the roast on the sauté setting for 4-5 minutes per side.
Add aromatics and deglaze with broth or drink, then pressure cook on high for about 60-70 minutes, depending on size.
Let it naturally release pressure for tender, shreddable meat.
This method replicates slow braising with much faster results, preserving moisture and developing rich flavor.
Is Arm Roast Suitable for Grilling or Pan-Frying?
Arm roast isn’t ideally suited for grilling or pan-frying due to its high connective tissue content.
These methods cook quickly and at high heat, which won’t break down collagen, resulting in tough, chewy meat.
If you do grill or pan-fry, expect a less tender outcome unless you slice thinly and marinate extensively.
For best results, slow, moist cooking methods like braising or slow roasting are necessary to tenderize this cut properly.
The Secret to Great Arm Roast Lies in Low-and-Slow Cooking
Now that you’ve mastered selecting and seasoning your arm roast, the real secret lies in perfecting your cooking method.
Whether braising low and slow or smoking before a tender braise, don’t rush; patience transforms this cut into melt-in-your-mouth perfection.
Once you’ve tasted that rich, flavorful crust and juicy interior, you’ll never settle for anything less.
Ready to elevate your roast game? Your next meal’s success hinges on the small details you’ve just learned.