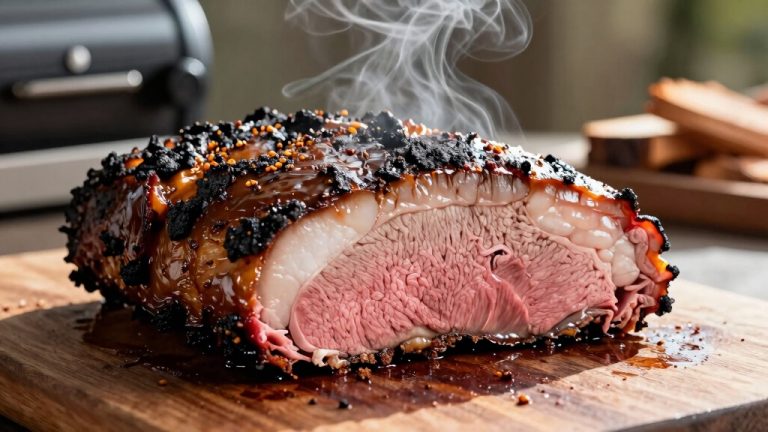
Flat Point Brisket Recipe: Pitmaster Tips for Perfect Results
Choose a well-marbled point and lean flat brisket for balanced flavor and texture. Trim fat caps strategically: 1/8 inch on the flat and 1/4 inch on the point.
Apply a classic rub with coarse salt, pepper, garlic, and paprika using a light binder like mustard. Smoke flat low and slow at 225°F–250°F, separating the point for tenderness or burnt ends.
Rest the brisket fully before slicing thinly against the grain. Keep going to master perfect burnt ends and advanced smoking techniques.
Key Takeaways
- Trim the flat to 1/8 inch fat cap and the point to 1/4 inch, preserving marbling for juiciness and flavor.
- Season both cuts generously with kosher salt, coarse pepper, garlic and onion powder, and apply yellow mustard as a binder.
- Smoke at 225°F to 250°F until internal temperature reaches 195°F to 203°F, wrapping during the stall phase to retain moisture.
- Rest the brisket loosely tented for at least 30 minutes to one hour to lock in juices before slicing against the grain.
- Cube the point after cooking, glaze with butter, brown sugar, and BBQ sauce, then return to smoker for caramelized burnt ends.
Flat Point Brisket Cooking Time & Temperature Table
| Recipe Detail | Information |
|---|---|
| Main Term | Flat Point Brisket Recipe |
| Recipe Type | Smoked BBQ Main Course |
| Cuisine | Texas BBQ / American |
| Difficulty Level | Intermediate |
| Prep Time | 30 Minutes |
| Cook Time | 10–14 Hours |
| Rest Time | 1 Hour |
| Total Time | 11–15 Hours |
| Servings | 10–14 |
| Main Ingredient | Beef Brisket Flat & Point |
| Cooking Method | Low and Slow Smoking |
| Smoker Temperature | 225°F–250°F |
| Target Internal Temperature | 195°F–203°F |
| Wrap Temperature | Around 165°F |
| Resting Time | 30–60 Minutes |
| Binder | Yellow Mustard |
| Seasoning | Kosher Salt, Black Pepper, Garlic Powder, Onion Powder, Paprika |
| Wood Choice | Oak, Hickory, Pecan |
| Best For Flat | Thin Slices, Sandwiches |
| Best For Point | Burnt Ends, Juicy BBQ |
| Burnt Ends Finish | Butter, Brown Sugar & BBQ Sauce |
| Slice Direction | Against the Grain |
| Storage | Refrigerate in Airtight Container |
| Refrigerator Life | 3–4 Days |
Choose the Right Brisket Flat and Point Cuts

Start by selecting brisket cuts that suit your cooking goals. The flat offers leaner, uniform slices ideal for sandwiches and presentation. The point provides richer marbling and juiciness perfect for burnt ends or standalone servings.
Choose brisket cuts wisely: flat for lean, uniform slices; point for rich marbling and juicy burnt ends.
When choosing the flat, look for a rectangular shape weighing between 4 to 8 pounds with minimal marbling. This ensures even cooking and clean slicing.
For the point, expect a smaller, thicker cut around 2 to 4 pounds, featuring abundant fat that enhances moisture and flavor.
You can opt to keep them attached for a traditional cook or separate them for tailored methods. Selecting fresh, well-marbled pieces with consistent thickness guarantees peak smoke penetration and tenderness in your final brisket.
To achieve optimal tenderness and juiciness, it is recommended to pull the brisket around 203°F internal temperature, where collagen breakdown and moisture retention are balanced for the best results.
Trim and Season Your Brisket Flat and Point
When you’re getting ready to trim your brisket point, the first thing you want to do is remove any excess fat. Just keep in mind to leave some of that marbling intact—it really helps keep the meat juicy while it cooks.
Next up, it’s time to season! Go ahead and sprinkle on a generous, even blend of your favorite seasonings. This is what’s going to enhance the flavor and help develop that delicious bark we all love.
For best results, consider trimming the fat cap to an even layer to prevent greasiness while preserving enough fat to baste the meat during cooking, a crucial step in fat cap trimming.
Trimming Techniques for Flat
Focus on creating a uniform shape when trimming your brisket flat by removing thick, hard fat layers and squaring off the edges.
Start by trimming excess fat cap down to about 1/8 inch, guaranteeing it’s even to promote consistent cooking.
Use a sharp boning knife to carefully peel away large, dense fat deposits that won’t render properly.
Square the edges by trimming ragged or uneven portions so the flat maintains a rectangular form, which aids uniform heat exposure and presentation.
Also, remove any silver skin or tough membranes that could prevent seasoning penetration.
Keep lean meat intact to avoid drying out during the low-and-slow cook.
Proper trimming guarantees even smoke absorption, a balanced cook, and a clean slicing surface for your brisket flat.
For the most accurate doneness guidance, insert your temperature probe into the thickest part of the flat muscle to monitor the core temperature effectively.
Seasoning Essentials for Brisket
Although trimming prepares your brisket flat and point for cooking, seasoning is what truly unlocks their full flavor potential.
You want to create a well-balanced rub that enhances the natural beefy taste while building a flavorful bark during smoking. Start by patting the meat dry to make certain the seasoning sticks evenly.
Apply a light binder like yellow mustard to help the rub adhere without overpowering the brisket.
Focus on these essentials for seasoning:
Use a classic rub blend: kosher salt, coarse black pepper, garlic powder, onion powder, and a touch of paprika for depth.
Season generously on all surfaces, including edges, to ensure uniform flavor penetration and crust formation.
Let the seasoned brisket rest briefly to absorb the rub before cooking.
This approach guarantees a robust, savory crust and enhances tenderness throughout.
For best bark development, ensure the rub consists of coarse-ground ingredients to maximize texture and smoke particle embedding.
Preparing Point for Cooking
Trim the brisket point carefully to remove excess fat while preserving enough marbling to keep it juicy during cooking. Start by trimming thick fat caps down to about ¼ inch; this protects the meat without causing flare-ups.
Remove any silver skin or hard fat that won’t render well.
Next, season the point generously with your rub, ensuring you coat all surfaces and edges evenly.
Use a light binder like yellow mustard to help the seasoning adhere and promote bark formation. Since the point is fattier and thicker than the flat, a robust seasoning blend with salt, pepper, garlic, and paprika works best.
Proper trimming and seasoning set the foundation for even cooking and maximize tenderness and flavor in your finished brisket point. Spritzing during cooking can help maintain surface moisture and enhance bark development for a flavorful crust.
Smoke Your Brisket Flat: Temperature and Timing
When you smoke your brisket flat, maintaining a steady temperature between 225°F and 250°F is essential for rendering the lean meat tender without drying it out. This low-and-slow approach guarantees even cooking and a well-developed bark.
Target an internal temperature of 195°F to 203°F for probe-tender perfection. Monitor the stall phase, typically between 155°F and 165°F, and consider wrapping the flat to retain moisture.
To optimize your smoke session, maintain consistent airflow and temperature control in your smoker.
Spritz the flat periodically with apple cider vinegar to keep it moist. Use a reliable meat thermometer for accurate internal temperature tracking.
Wrapping the brisket flat around 165–170°F, known as the Texas crutch, can help speed through the stall and lock in moisture for a juicier result.
Cook Your Brisket Point Separately for Best Results
Separating the brisket point from the flat allows you to tailor the cooking process to its higher fat content and thickness, guaranteeing peak tenderness and juiciness.
Since the point is fattier and thicker, it benefits from a slightly longer cook time at 225°F to 250°F. This allows the fat to render fully and the connective tissue to break down without drying out.
Monitor the internal temperature carefully, aiming for 195°F to 203°F or a probe-tender texture.
Wrapping the point in butcher paper or foil during the stall helps retain moisture while speeding up the cook.
After wrapping, you can optionally raise the smoker temperature to 275°F to firm up the bark.
Cooking the point separately guarantees it reaches ideal doneness without overcooking the leaner flat.
For best results, trim the fat cap to approximately 1/4 inch to balance smoke penetration with moisture retention.
Rest, Slice, and Serve Your Brisket
Alright, so once your brisket point hits that perfect tenderness, it’s super important to let it rest for at least an hour. This lets the juices redistribute, ensuring every bite is juicy and flavorful.
Now, when you’re ready to slice, remember: cut against the grain. This little trick really helps to maximize tenderness and makes your brisket look amazing on the plate.
And don’t forget the finishing touches! Serve it up with some complementary sides or sauces that really bring out that rich, smoky flavor. Your taste buds will thank you!
For best results, make sure to wrap your brisket tightly in foil or butcher paper and rest it at a safe internal temperature to lock in moisture and enhance tenderness.
Optimal Resting Time
Although the brisket may look ready off the smoker, you should let it rest for at least one hour to allow juices to redistribute evenly throughout the meat. Resting prevents the juices from spilling out when sliced, preserving tenderness and flavor.
Wrap your brisket loosely in foil or butcher paper to retain heat without steaming the bark.
To maximize resting benefits, keep the brisket in a warm, draft-free place to maintain temperature. Avoid slicing too soon; cutting early causes moisture loss and dryness. Use a cooler or insulated container for extended resting up to two hours.
Using a preheated cooler wrapped with towels is an effective method to maintain safe temperatures and enhance moisture retention during rest.
Following these steps guarantees your flat point brisket remains moist, tender, and flavorful, delivering an exceptional eating experience every time.
Slicing Techniques
Before you slice your brisket, make certain it has rested sufficiently to lock in its juices and maintain tenderness.
Use a sharp slicing knife and slice against the grain for the most tender bites. For the flat cut, identify the grain running lengthwise and cut thin, uniform slices about ¼ inch thick.
Avoid sawing motions; instead, use smooth, deliberate strokes to preserve texture and presentation.
| Step | Detail |
|---|---|
| Resting Time | 1 hour, tented in foil |
| Knife Type | Sharp, long slicing knife |
| Slice Direction | Against the grain |
| Slice Thickness | ¼ inch for flat brisket |
| Serving Tip | Arrange slices overlapping neatly |
This technique guarantees juicy, tender brisket slices ready to impress. Always refrigerate cooked brisket within two hours to ensure safe storage and maintain its quality.
Serving Suggestions
When you’re ready to serve, make sure the brisket has rested properly to allow its juices to redistribute evenly, preserving tenderness and flavor.
Resting for at least 30 minutes, loosely tented with foil, prevents moisture loss and enhances texture. When slicing, cut thinly against the grain to maximize tenderness and presentation. Serve immediately for the best experience.
Consider these serving suggestions:
Pair slices with classic sides like coleslaw, baked beans, or potato salad to complement the brisket’s rich flavor.
Offer barbecue sauces on the side, allowing guests to customize their taste without masking the brisket’s seasoning.
Present the flat brisket slices on a warm platter to maintain heat and encourage immediate enjoyment.
These steps make certain your brisket shines as the centerpiece of any meal.
Make Classic Burnt Ends From the Brisket Point
Since the brisket point contains abundant marbling and fat, it’s ideal for crafting classic burnt ends that are tender, flavorful, and richly caramelized.
Start by smoking the whole brisket or separate the point, cooking it low and slow at 225°F to 250°F until it reaches 195°F to 203°F and becomes probe-tender.
Once done, cube the point into evenly sized pieces. Toss these cubes with a glaze combining butter, brown sugar, and BBQ sauce for sweetness and moisture.
Return the glazed cubes to your smoker or oven at 225°F to 250°F for 45 minutes to 2 hours, allowing the exterior to develop a sticky, caramelized bark.
This method maximizes the point’s fat content to yield burnt ends bursting with rich, smoky flavor and an irresistible texture.
Frequently Asked Questions
Can I Use a Gas Smoker Instead of Charcoal for Brisket Flat and Point?
Yes, you can definitely use a gas smoker instead of charcoal for cooking brisket flat and point.
Gas smokers offer consistent temperature control, which helps maintain the low-and-slow cooking needed between 225°F and 250°F.
Just make sure to add wood chips for smoke flavor since gas alone won’t provide that.
Monitor internal temperatures carefully to reach 195°F–203°F probe-tender, ensuring your brisket turns out tender and flavorful.
How Do I Store Leftover Brisket to Maintain Its Flavor and Texture?
Want your leftover brisket to taste just as good as when you first sliced it? Wrap it tightly in butcher paper or foil to lock in moisture and flavor.
Store it in an airtight container in the fridge within two hours of cooking. When reheating, do it low and slow at around 250°F wrapped again to maintain tenderness and avoid drying out.
Proper storage and gentle reheating preserve that perfect bark and juicy texture.
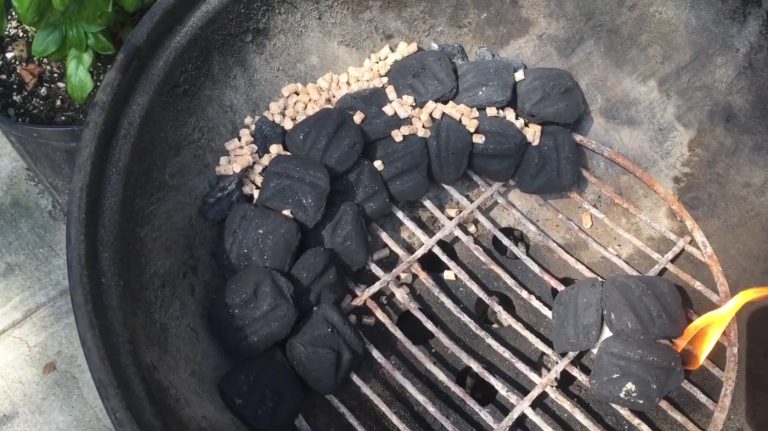
What Type of Wood Is Best for Smoking Brisket Flat and Point?
You’ll want to choose hardwoods like oak, hickory, or pecan for smoking brisket flat and point.
Oak offers a balanced, medium smoke flavor that complements the beef without overpowering it.
Hickory provides a stronger, meet-like smoke, perfect if you want a robust taste.
Pecan gives a slightly sweet, nutty flavor that pairs well with brisket’s richness.
Avoid softwoods; they produce harsh, resinous smoke that ruins flavor.
Can I Substitute Brisket Flat With Another Cut for Burnt Ends?
You can’t fit a square peg in a round hole when making classic burnt ends. They’re traditionally made from the brisket point because of its higher fat content, which caramelizes beautifully.
If you substitute the flat, expect a leaner, less juicy result that won’t develop the signature richness or bark.
For burnt ends, the point’s marbling and fat render are essential. Stick with that cut for authentic, tender, flavorful burnt ends.
How Long Can I Safely Keep Cooked Brisket in the Refrigerator?
You can safely keep cooked brisket in the refrigerator for 3 to 4 days.
Make sure to store it in an airtight container or tightly wrapped in foil or plastic wrap to maintain moisture and prevent contamination.
Always cool the brisket to room temperature within two hours of cooking before refrigerating.
If you want to keep it longer, freeze it, where it can last up to 2 to 3 months without significant quality loss.
Brisket Flat vs. Point: Differences, Cooking Tips, and Best Uses
Now that you’ve mastered the art of choosing, trimming, seasoning, and smoking both brisket flat and point cuts, you’re basically a brisket wizard. Your perfectly cooked flat will melt like butter, and those burnt ends? Legendary.
Follow these steps, and you’ll turn any barbecue into a mouthwatering masterpiece. Trust me, once you nail this recipe, you’ll have friends begging for your brisket secrets like it’s the eighth wonder of the culinary world.