Where to Put Temp Probe in Brisket? Step-by-Step Advice
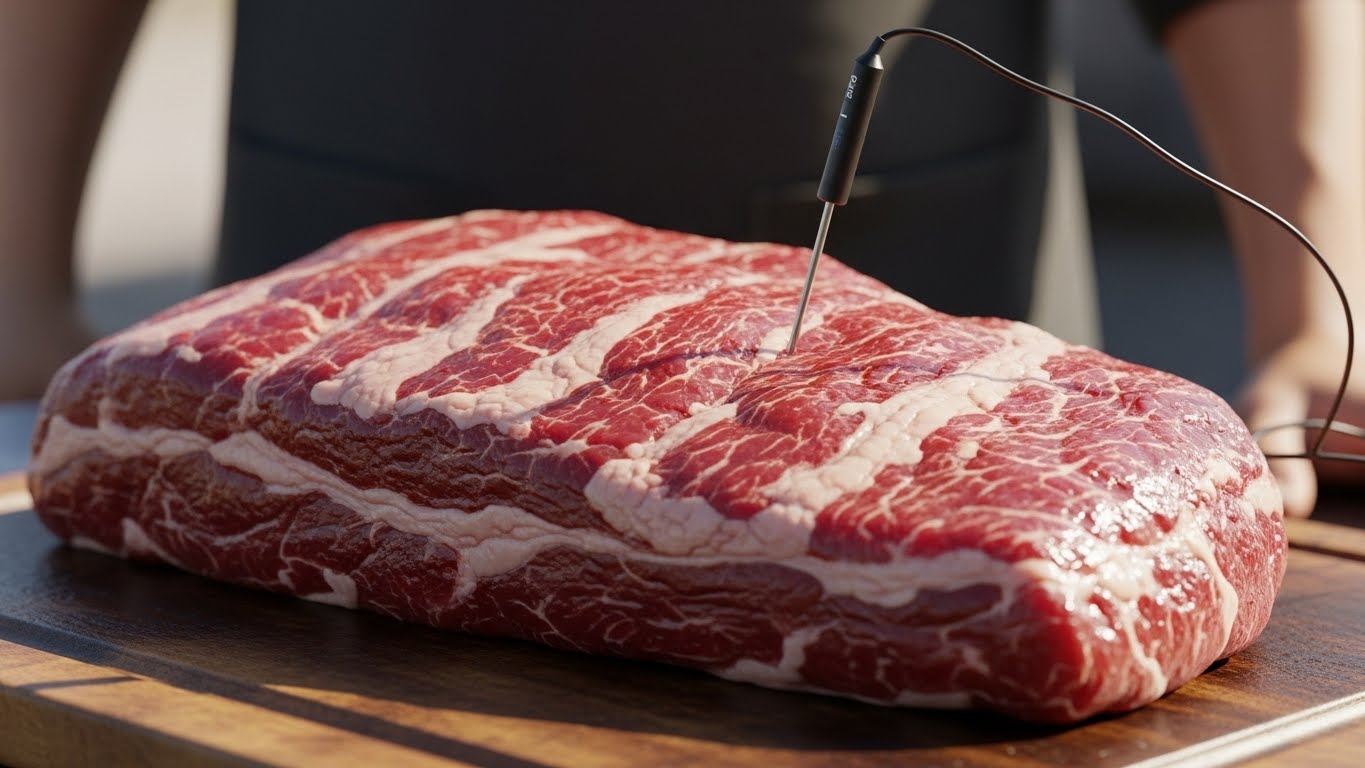
You want to insert your temp probe horizontally into the thickest part of the brisket’s flat muscle. This is usually the tallest hump where the flat and point overlap.
Avoid fat seams, thin edges, and large fat pockets. Push the probe deep enough to reach the center of the meat fibers, about halfway through thickness, to get a reliable internal temperature.
Placing a second probe in the thick point near the overlap helps track both muscles separately for perfect doneness. Understanding proper placement and interpretation will improve your brisket’s outcome.
Key Takeaways
- Insert the probe horizontally into the thickest part of the flat muscle, aiming for the center to measure the core temperature accurately.
- Avoid placing the probe in fat pockets, seams, or near the flat’s narrow edges to prevent skewed or premature temperature readings.
- Position the probe shaft parallel to the cooking grate, pushing it halfway to two-thirds through the meat thickness for stable readings.
- Insert a second probe into the thickest area of the point muscle, about a palm’s width from the flat probe, to monitor both muscles separately.
- Use a leave-in probe to continuously monitor temperature without opening the smoker, ensuring consistent placement throughout the cook.
How to Find the Thickest Part of the Brisket: And Why It Matters?
Start by visually scanning the brisket’s side profile to locate its tallest hump. This area is where the flat and point muscles overlap. Recognizing this spot is essential because it is also where the temperature stall typically manifests during cooking, affecting how you monitor doneness.
Begin by examining the brisket’s side to find the prominent hump where flat and point merge.
This thickest section sits above or just offset from the internal fat seam separating the lean flat from the fattier point.
Feel the brisket’s surface with your fingers, sliding across to detect the most domed, dense area rather than flatter or tapered ends.
Avoid the narrow nose of the flat or thin flaps prone to drying out.
Recognize that the point muscle is the thickest, positioned at the bulbous end with a substantial fat cap thinning toward the flat’s narrow side. The point muscle is preferred for burnt ends due to its higher fat content and longer cook tolerance.
Why Probing the Flat Muscle Gives the Best Doneness Guide?
Locating the thickest part of the brisket sets the stage for accurate temperature readings, but knowing exactly where to insert your probe makes all the difference.
You want to target the flat muscle because it contains lean, uniform fibers with less fat, giving you a clearer, more consistent temperature and tenderness reading.
The flat’s even thickness means its internal temperature reflects the overall doneness better than the point. Since the flat is prone to dryness if overcooked, probing here provides a cautious gauge to avoid ruining your brisket. Retaining the fat cap and cooking the brisket fat-side down helps reduce bottom drying by providing insulation. Additionally, wrapping the brisket tightly during rest helps maintain moisture and enhances flavor development.
Use the flat to judge when collagen has fully converted and the meat feels “probe tender,” the hallmark of perfect doneness.
Checking the flat every 10–15 minutes near target temps ensures you pull your brisket at its best. Using a leave-in probe combined with a remote receiver allows for continuous monitoring without opening the smoker, maintaining stable cooking conditions and preventing temperature fluctuations that could affect the brisket’s texture.
Where to Place a Second Probe in the Brisket Point?
When you’re ready to place your second probe in the brisket point, make sure to find the thickest area. You definitely want to steer clear of the fat caps and those hard seams. This way, you can ensure that you’re getting accurate temperature readings.
So, here’s a tip: insert the probe horizontally, about halfway through the meat. Just be cautious to avoid any surface fat and the cooking grate. That’ll help you get stable temperature data. For the most reliable readings, it’s best to insert probe in the middle of the thickest area where there is more fat and connective tissue. Always ensure the probe is fully inserted for at least 10 seconds to achieve stable temperature readings.
Thickest Point Placement
Frequently, the thickest point of the brisket point sits near where the point overlaps the flat rather than at the packer’s geometric center. This area often takes longer to cook due to its density and position within the cut, so accurate monitoring is essential for temperature consistency.
So you’ll want to visually and physically identify this domed, muscular area for your second probe placement.
Focus on the center mass of this thickest section, avoiding fat seams and surface layers to guarantee accurate temperature readings.
Proper placement here tracks the coldest internal region, critical for monitoring the point’s slower cooking.
It is important to push the probe all the way into the center of this thickest part to ensure you are measuring the internal temperature at the coldest point.
| Aspect | Recommendation |
|---|---|
| Location | Near point-flat junction |
| Target Zone | Center mass of thickest area |
| Avoid | Fat seams and surface proximity |
| Purpose | Monitor coldest, slowest-cooking spot |
Probe Insertion Technique
Insert the second probe horizontally from the side of the brisket point, aiming to run the shaft parallel to the cooking grate for stable, accurate readings. Start at the thicker end near the flat-to-point seam, pushing past the exterior fat cap to reach solid meat. Avoid placing the tip in pure fat to prevent false high temps. If you experience any difficulty with your probe readings, be aware that some security services like Cloudflare can block access to related online resources that might provide troubleshooting help.
Angle the probe slightly upward from the point’s bottom edge to avoid contacting the grate or heat deflector. Use gentle twisting to slide the tip between muscle fibers, minimizing juice loss and damage. Maintain a depth of about ½ to 1 inch above the cooking surface. Properly seasoning your smoker before cooking can help ensure consistent temperature and accurate probe readings.
Position the probe offset toward the center of the point muscle, spaced a palm’s width from the flat probe, ensuring reliable dual-muscle temperature tracking during cook. Regular maintenance and re-seasoning of your smoker will preserve performance and help prevent temperature fluctuations that might affect probe accuracy.
Monitoring Point Temperature
Placing a second probe to monitor the brisket point guarantees you capture temperature differences between the two muscles, preventing premature removal and undercooked results.
Insert this probe into the thickest, central section of the point, avoiding seams or heavy fat pockets that skew readings.
Position it on the side shielded from direct heat, especially in offset smokers, to measure true internal temperature without surface influence. This positioning also helps maintain steady smoker temperature for consistent cooking.
This setup lets you track the point’s slower cook, which often lags 5–15°F behind the flat, and manage stalls more precisely.
Use point data to decide if the cook needs extending or if separating the point for further rendering is necessary.
Consistent placement relative to your pit setup secures reliable, repeatable readings, helping you nail perfect tenderness every time. Many experienced pitmasters recommend using two probes—one in the point and one in the flat—to get the most accurate overall temperature profile of the brisket two probes recommendation.
How to Insert the Probe for Accurate Internal Temperature Readings?
Although it might seem straightforward, getting an accurate internal temperature reading requires careful probe placement in the brisket’s thickest flat muscle.
Insert the probe horizontally from the side, aiming straight into the center of the thickest area. This guarantees the tip rests fully within the muscle fibers, away from fat or air gaps that distort readings.
Push the probe deep enough, about halfway to two-thirds through the thickness, to capture the coolest, most representative internal temperature. Hold the probe steady to avoid shifting during the cook. Proper temperature monitoring is essential when using double layer wrapping or other holding techniques to maintain heat consistency.
- Insert probe with the grain, horizontally from the flat’s back side.
- Place tip centrally in the thickest muscle area, not near edges.
- Avoid fat seams and external fat cap contact.
- Maintain consistent insertion depth throughout cooking.
- Leave probe in place for stable temperature readings before checking.
Proper probe placement is critical because the flat and point muscles cook at different rates, and inserting in the flat avoids the risk of overcooking the lean flat.
Common Probe Placement Mistakes That Mess Up Your Brisket Temps
When you’re probing your brisket, one common mistake is sticking the probe into those thin edges. You know, the spots where temperatures can spike. That happens because there’s not much insulation there, which can really throw off your readings. In cold weather, these areas can cause even more pronounced temperature fluctuations due to heat loss.
Another thing to watch out for is fat pockets. If you insert the probe into one of those, you might get a reading that’s way off. Fat heats differently than the meat around it, so it can definitely mislead you.
And hey, once you’ve got the probe in, try to keep it steady. If you’re constantly moving it around, it’s going to mess with your tracking. You want to get a real sense of the brisket’s internal temperature, and constant movement can hide what’s really happening inside. Also, be mindful to avoid placing the cable or probe tip in direct contact with metal grates or hot spots, as these areas can reach much higher temperatures and cause inaccurate readings or damage the probe hot spots risk.
Probing Thin Edges
When you stick your probe too close to the thin edges of a brisket, you risk getting misleading temperature readings that can throw off your entire cook.
Thin edges heat up faster, causing premature “done” signals while the center remains undercooked. This leads to dry, tough slices and inaccurate timing for wrapping or pulling. Using proper probe placement deep in the thickest part preserves internal temperature accuracy.
Avoid these common pitfalls:
Thin edges hit target temp too soon, drying out meat.
Temperature swings exaggerate near edges, confusing readings.
Tapered areas show inconsistent temps due to mixed fat and lean.
Shallow probe placement tracks surface heat, not core temperature.
Probing along grain at edges gives false tenderness, masking toughness.
Aim for the deep center of the thick flat to make certain accurate, consistent doneness throughout. If you encounter a security block like the one from Cloudflare protection, it may prevent you from accessing essential resources on brisket cooking techniques.
Ignoring Fat Pockets
Ignoring fat pockets during probe placement can seriously skew your brisket’s temperature readings and derail your cook.
Fat heats and cools differently than lean muscle, so if your probe sits in a fat seam or cap, it’ll give false highs or lows.
Rendered fat often reads hotter than the adjacent meat, misleading you into thinking the brisket is done when collagen remains tough. Monitoring the internal temperature is crucial because color or texture alone can be misleading due to myoglobin interactions.
Large fat pockets also insulate underlying muscle, causing lagging temperatures.
Avoid burying the probe in visible fat seams or thick fat caps; target the thickest area of lean, marbled muscle instead. Using a probe thermometer designed for meat temperature measurement will help ensure accurate readings when placed correctly.
When inserting from the side, feel for resistance changes to make certain the tip reaches true muscle, not soft fat.
Correct placement guarantees accurate temps, better texture, and fully rendered brisket.
Frequent Probe Movement
Frequently moving your probe during the cook can disrupt accurate temperature readings and lead to inconsistent results. Each time you adjust the probe, you risk measuring different muscle areas or depths, which skews your data and compromises your judgment on doneness. Probes placed too close to fat pockets or the underside can give misleading false high readings, so stable, well-centered placement is crucial.
Stick to a stable placement in the thickest part of the flat, inserted vertically from above to avoid steam-related errors.
To avoid common pitfalls, keep these points in mind:
Don’t reposition the probe repeatedly; pick a reliable spot and leave it.
Insert the probe deep enough to reach the center muscle, not just the surface.
Avoid lateral insertion that exposes the probe to steam or condensation. Keep cables off hot grates to prevent damage and false readings.
Check multiple insertion points only before cooking, not during.
How to Interpret Probe Readings and Know When to Pull Your Brisket?
Although internal temperature provides essential guidance, you should rely primarily on probe tenderness to decide when to pull your brisket.
Internal temperature helps, but probe tenderness is your best indicator for when to pull brisket.
Begin tenderness checks around 195–200°F, probing the thickest part of the flat and point to gauge uniform softness. It is common to use multiple probes aimed at the same spot to improve the chance of an accurate reading.
The brisket is ready once the probe slides in with little resistance, like warm peanut butter, across multiple spots.
Don’t fixate solely on reaching 200–205°F; connective tissue might need more time to fully render.
Keep in mind the stall between 150°F and 170°F can slow temperature rise, but tenderness can develop earlier, especially in well-marbled cuts.
Use your probe horizontally into the center muscle for accurate readings, and test several areas to avoid under- or overcooking.
When multiple spots feel probe tender, it’s time to pull your brisket.
Frequently Asked Questions
Can I Use a Wireless Probe for Brisket Temperature Monitoring?
Think of using a wireless probe like having a weather station for your brisket. You get real-time updates without leaving your couch.
Yes, you can definitely use a wireless probe to monitor brisket temperature. Just make certain it’s rated for temps up to about 212°F and insert it deep into the thickest part of the meat.
This helps you cook precisely, avoid overcooking, and maintain smoke quality with fewer lid openings.
How Does Brisket Size Affect Ideal Probe Placement?
Brisket size directly affects your probe placement because larger cuts have thicker sections that require careful targeting.
You’ll want to insert the probe into the thickest part of the flat, pushing it all the way to the center for accurate readings.
For bigger briskets, consider using two probes, one in the flat and one in the point, to monitor different cooking rates and make certain both sections reach proper tenderness.
What Type of Temperature Probe Is Best for Brisket?
Did you know digital probes can respond in just 2–3 seconds? For brisket, you want a leave-in probe with ±1–2°F accuracy around 200–210°F.
These let you monitor temps continuously without opening the smoker, preserving heat. Pair it with an instant-read needle probe for quick checks.
Opt for probes with high heat resistance (500°F+), Bluetooth connectivity, and durable, heat-proof cables to guarantee reliable, precise temperature tracking throughout your long cook.
Should I Calibrate My Temperature Probe Before Cooking Brisket?
Yes, you should definitely calibrate your temperature probe before cooking brisket. Calibration guarantees accurate readings, preventing overcooking or undercooking during your long cook.
Use an ice bath and boiling water tests to check and adjust offsets. This precision lets you confidently hit internal temps like 200–205°F, preserving moisture and tenderness.
Regular calibration also safeguards food safety by confirming your brisket passes through danger zones properly. Don’t skip this critical step.
How to Clean and Maintain Probes After Brisket Cooking?
You should clean your probe right after cooking by wiping off grease with a dry towel.
Then wash the metal part in hot, soapy water using a soft cloth to avoid scratches.
Rinse thoroughly under running water to remove soap.
Sanitize with 70% isopropyl alcohol or diluted bleach, then rinse again.
Avoid submerging electronic parts, dry completely, and store in a dry place.
Regular deep cleaning and checks keep your probe accurate and durable.
Double-Check Placement for Accurate Brisket Temps
You might think sticking the probe anywhere will do, but placing it in the thickest part of the flat muscle gives you precise doneness. Guessing risks a dry, overcooked brisket.
Using a second probe in the point guarantees even cooking, avoiding surprises when slicing. Insert the probes carefully, avoiding fat pockets.
Mastering these details means you pull your brisket at just the right moment—juicy, tender, and perfectly smoked every time.