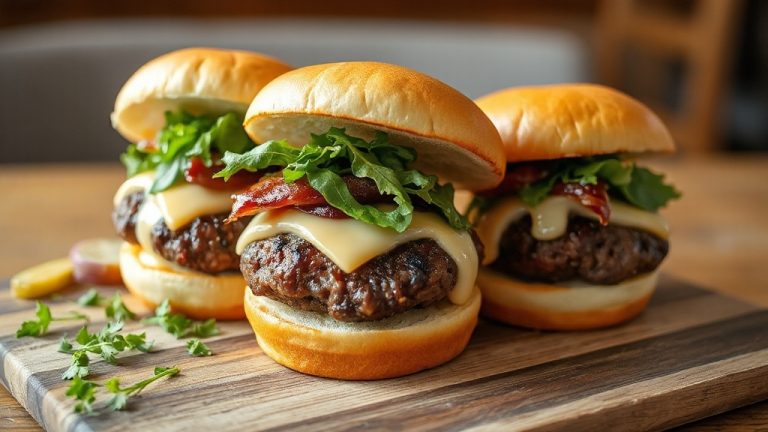
Snack Stick Recipe: Easy Homemade Jerky-Style Meat Sticks
Start by selecting lean venison with trimmed silver skin and firm meat fat, aiming for a 60/40 meat-to-fat ratio.
Keep all ingredients chilled, grind uniformly through a 1/4-inch plate, and thoroughly mix in precise seasonings with binders.
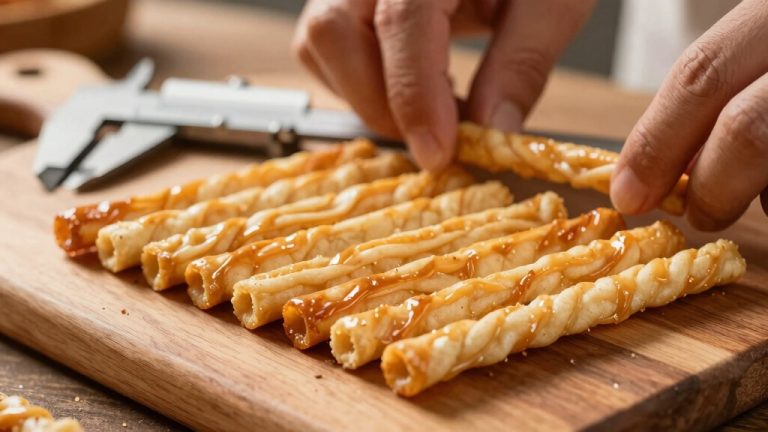
Use collagen or sheep casings, stuffing evenly to avoid air pockets. Smoke gently, raising temperature incrementally to 170°F, ensuring an internal doneness of 155°F.
After prompt cooling and proper storage, your snack sticks will have ideal texture and safety. Additional details await for mastering every step.
Key Takeaways
- Use lean venison with trimmed meat fat at a 60/40 meat-to-fat ratio for optimal flavor and texture.
- Chill all meat, fat, and equipment before grinding to prevent smearing and ensure clean cuts.
- Grind meat through a 1/4-inch plate, alternating meat and venison every 8 ounces for even distribution.
- Season precisely with kosher salt, curing salt, black pepper, and spices, mixing until the mixture is tacky.
- Stuff pre-soaked collagen casings evenly, smoke gradually from 100°F to 170°F, and cook until internal temperature reaches 155°F.
Snack Stick Recipe Table
| Main Term | Details |
|---|---|
| Recipe Name | Snack Stick Recipe (Jerky-Style Homemade Meat Sticks) |
| Main Meat | Lean venison with trimmed silver skin |
| Fat Ratio | 60% venison / 40% meat fat for moisture and texture |
| Casings | 16–22 mm collagen or sheep casings (17mm–19mm preferred) |
| Grinding Plate | 1/4-inch medium grinding plate |
| Seasonings | Kosher salt, curing salt, black pepper, garlic, mustard, spices |
| Binders | Soy protein or similar binder with ice water |
| Mixing Goal | Mix until meat becomes tacky for proper binding |
| Stuffing Method | Stuff evenly into casings, avoid air pockets |
| Smoking Temperature | Start at 100°F, gradually increase |
| Final Cooking Temperature | Smoker at 170°F |
| Safe Internal Temperature | 155°F internal temperature |
| Cooling Process | Cool immediately after cooking to stabilize texture |
| Storage Method | Refrigerate below 40°F, vacuum seal for longer storage |
| Shelf Life | Up to 3 weeks refrigerated, several months frozen |
How To Make Snack Sticks: A Quick Overview?

Although making snack sticks involves multiple precise steps, you can streamline the process by carefully preparing your meat and seasoning mixture, maintaining strict temperature control, and using appropriate casings for stuffing.
First, chill your meat and fat until firm to guarantee clean grinding and prevent smearing. Grind through a medium plate, alternating meat and venison every 8 ounces for uniformity.
Chill meat and fat until firm, then grind using a medium plate, alternating meat and venison every 8 ounces.
Thoroughly mix seasonings with the meat until tacky, incorporating binders and ice water to achieve the ideal texture. Select collagen or sheep casings between 16-22 mm and stuff evenly to avoid air pockets.
During cooking, gradually raise the temperature to prevent fat melting, targeting an internal temperature of 155°F at 170°F.
Finally, cool the sticks promptly to stabilize texture and flavor.
For home processors, 17mm and 19mm collagen casings are preferred as they provide an optimal balance between stuffing effort and snack stick size, enhancing overall processing efficiency.
Pick The Best Meat And Fat For Snack Sticks
When you’re making snack sticks, start by choosing lean venison, and don’t forget to remove the silverskin. This step is key for achieving a clean texture and flavor.
Now, let’s talk about fat. Aim for about 40% meat fat. This will help keep your snack sticks moist and prevent them from drying out during cooking.
Getting that meat-to-fat ratio just right is essential. It really helps with binding, mouthfeel, and overall stability of the final product. So take your time and balance it well!
For safe processing, ensure the internal temperature reaches at least 165°F during processing to reduce pathogen risk and achieve proper texture.
Venison Selection Tips
When selecting venison for snack sticks, prioritize cuts with minimal silver skin and connective tissue to guarantee a smooth grind and consistent texture.
You want lean, firm meat that binds well with fat and seasonings. Avoid overly sinewy or fatty sections that cause uneven mixing or greasy flavor.
Consider these guidelines:
- Choose muscle groups like the hindquarters or backstrap for peak leanness and tenderness.
- Remove all visible silver skin to prevent tough, chewy bits in the final product.
- Inspect for fresh, bright color and firm texture indicating quality and proper aging.
- Trim excess fat from venison, as you’ll add controlled meat fat later for balance.
This selective approach makes certain your snack sticks have uniform texture, superior flavor, and ideal mouthfeel. Cuts like the teres major muscle are ideal examples of lean, tender meat with low connective tissue that enhance the final product’s quality.
Meat Fat Importance
Texture plays a critical role in crafting high-quality snack sticks, and selecting the right meat fat markedly influences this attribute. You need meat fat with a firm, white appearance and minimal blood spots to guarantee purity and consistency.
Opt for fat trimmed of connective tissue to prevent gristle formation, which disrupts texture. The fat’s melting point is vital; it must render slowly during smoking without causing the snack stick to become greasy or lose structural integrity.
Incorporating 20-30% meat fat balances moisture retention and mouthfeel, enhancing juiciness and tenderness. Avoid overly soft or yellowish fat, as it indicates poor quality or improper storage, affecting flavor and safety.
For optimal preservation during short-term storage, wrapping your snack sticks in butcher paper’s breathable material helps maintain texture without trapping excess moisture.
Balancing Meat Ratios
Achieving the ideal balance between venison and meat fat is essential for crafting snack sticks with peak flavor, texture, and structural integrity.
Venison alone is lean and dry; incorporating meat fat enhances moisture, mouthfeel, and binding capacity. Aim for approximately 60% venison to 40% meat fat, adjusting slightly based on fat quality.
Consider these factors when selecting your meat ratios:
- Fat distribution: Make certain even marbling to prevent dry, crumbly sticks.
- Temperature control: Keep meat and fat chilled to avoid smearing during grinding.
- Fat quality: Use firm, clean meat fat to maintain texture and reduce off-flavors.
- Lean adjustment: Add 10-15% beef or meat fat if venison is excessively lean.
This precise ratio optimizes flavor, juiciness, and structural cohesion in your snack sticks. Proper temperature control during preparation is critical to maintain the desired texture and ensure even mixing of fat and lean meat.
Grind, Mix, And Season Snack Stick Meat Properly
When you’re getting ready to make your snack sticks, start by grinding your venison and meat fat through a 1/4-inch plate. It’s super important to keep everything cold while you do this. This helps prevent smearing and ensures you get that perfect texture you’re after.
As you mix, try alternating the meats every 8 ounces. This little trick helps distribute everything evenly, which is key before you dive into adding your seasonings.
Speaking of seasonings, don’t skimp on the precision! Using measured spices along with a binder like soy protein is what’ll give your snack sticks that ideal flavor balance and texture. Enjoy the process!
For best results, ensure your sausage mixture is kept just above refrigerator temperature to promote even cooking and prevent thermal shock during smoking.
Proper Meat Grinding
Start by chilling your venison and meat fat until they’re firm to guarantee clean, consistent grinding without smearing. Maintaining low temperatures prevents fat from melting and secures a tight texture. Use a 1/4-inch medium grinding plate for uniform particle size.
Alternate grinding 8-ounce portions of meat and venison to achieve even distribution. Keep the meat cold between grinds by returning it promptly to the freezer or refrigerator.
Follow these steps precisely:
- Remove silverskin and dice meat and fat uniformly.
- Chill meat and fat until firm but not frozen solid.
- Grind meat-fat mixture through the 1/4-inch plate in alternating portions.
- Keep all equipment and meat chilled throughout the process to prevent smearing.
This process secures a stable matrix for proper binding and texture in your snack sticks. For best preservation and flavor retention, consider using chamber vacuum sealing to package your snack sticks airtight before storage.
Effective Seasoning Techniques
Master the seasoning process by evenly coating the ground meat and fat mixture with your carefully measured spices before mixing. Toss the meat thoroughly to assure uniform distribution of flavors, preventing pockets of under-seasoned or over-seasoned meat.
Use a stand mixer with a paddle attachment to mix until the texture becomes tacky, indicating proper binding. Incorporate ice water and soy protein binder to enhance moisture retention and texture. For optimal safety and flavor, maintain proper moisture control and temperature during drying.
Below is a precise breakdown of seasoning components for a 5-pound batch:
| Ingredient | Quantity | Purpose |
|---|---|---|
| Coarse kosher salt | 55 grams | Flavor, preservation |
| Pink curing salt | 1 teaspoon | Cure, color |
| Ground black pepper | 1 tablespoon | Heat, aroma |
| Mustard, garlic, spices | As per recipe | Depth, complexity |
This method guarantees consistent, flavorful snack sticks every time.
Stuff Casings Without Tears Or Air Pockets
When stuffing casings, carefully control the pressure to prevent tears and air pockets. These can compromise the snack stick’s texture and shelf life. You need consistent, moderate force to evenly distribute the meat mixture without overstretching the casing.
Avoid rushing; excess speed traps air and weakens casing integrity.
Follow these steps for ideal stuffing:
- Pre-soak casings thoroughly to increase flexibility and reduce tear risk.
- Maintain a steady, controlled feed rate on your stuffer to avoid sudden pressure spikes.
- Use gentle, continuous hand pressure to expel air pockets as the casing fills.
- Periodically prick visible bubbles with a sterile needle to release trapped air without damaging the casing.
Proper preparation and cleaning of your equipment before use, similar to the seasoning process, ensures optimal performance and product quality.
How To Smoke And Cook Snack Sticks?
With casings properly stuffed and free of air pockets, you can now focus on smoking and cooking the snack sticks to achieve the desired texture and flavor.
Begin by setting your smoker temperature at 100°F to gradually dry the casing and prevent fat rendering.
Start your smoker at 100°F to gently dry casings and avoid melting the fat.
Increase the temperature incrementally to 140°F, allowing smoke penetration without overheating.
Maintain a controlled environment to avoid casing rupture and fat melt.
Once the sticks are firm and have absorbed sufficient smoke, raise the temperature to 170°F to complete the cooking process evenly.
This ensures internal moisture retention and protein coagulation.
Use a reliable thermometer to monitor ambient and internal temperatures closely.
After cooking, promptly cool the sticks to halt cooking and stabilize texture, preserving the ideal chew and smoky profile.
For optimal smoke flavor, position the smoke source near a steady air source to guarantee consistent smoke flow during cooking.
Check When Snack Sticks Are Fully Cooked
Verify the doneness of your snack sticks by carefully monitoring their internal temperature using a calibrated meat thermometer. Achieving an internal temperature of 155°F (68°C) is critical to guarantee safety and proper texture.
Insert the thermometer probe into the center of the thickest part of the stick, avoiding contact with casing or bone.
- Confirm thermometer calibration for accuracy.
- Measure temperature at multiple points in the batch.
- Observe color changes; fully cooked sticks exhibit a uniform pinkish-brown hue.
- Guarantee no excess moisture or softness, indicating undercooking.
Accurate temperature assessment prevents fat melting or microbial risk. Rely on objective thermal data rather than appearance alone to determine completion.
Store And Serve Your Homemade Snack Sticks
Once your snack sticks reach the proper internal temperature and exhibit the correct texture, focus on preserving their quality through appropriate storage.
Immediately cool the sticks to room temperature, then refrigerate at or below 40°F to inhibit microbial growth.
For extended shelf life, vacuum-seal the sticks to reduce oxygen exposure, preventing oxidation and spoilage.
Store vacuum-sealed sticks in the refrigerator for up to three weeks or freeze at 0°F for several months.
When ready to serve, thaw frozen sticks in the refrigerator to maintain texture and flavor integrity.
Slice snack sticks uniformly for consistent serving size and optimal eating experience.
Avoid prolonged exposure to ambient air, which accelerates moisture loss and texture degradation.
Proper storage guarantees your homemade snack sticks retain safety, flavor, and texture for peak enjoyment.
Create Unique Snack Stick Variations And Add-Ins
Experimenting with unique flavor profiles and ingredient combinations lets you customize snack sticks to your preference while maintaining product integrity.
Exploring diverse flavors and ingredients allows personalized snack sticks without sacrificing quality or texture.
To create distinct variations, focus on precise seasoning adjustments and strategic add-ins that complement the base meat blend without compromising texture or curing efficacy.
Incorporate 2g/kg cayenne pepper for controlled heat, balancing with smoked paprika at 3g/kg to add depth.
Add 10g/kg finely chopped jalapenos or chipotle peppers to introduce smoky spiciness.
Blend in 10g/kg dried herbs like rosemary or thyme for aromatic complexity.
Introduce 5-10% alternative meats (e.g., beef or meat ) to modify fat content and mouthfeel.
Control moisture and fat ratios carefully to preserve binding and prevent casing rupture during smoking and drying.
Frequently Asked Questions
Can I Use a Different Type of Casing Besides Collagen or Sheep?
Yes, you can use alternative casings like synthetic fibrous or cellulose casings, but they function differently than collagen or sheep.
Synthetic casings often lack natural permeability and elasticity, impacting smoke absorption and texture.
Cellulose casings aren’t edible and require peeling post-smoking.
Consider casing diameter compatibility with your stuffing equipment.
Each casing type influences drying, smoking, and final product qualities, so adjust your process parameters accordingly for peak results.
How Long Can Homemade Snack Sticks Be Safely Stored in the Freezer?
You can safely store homemade snack sticks in the freezer for up to 3 to 4 months to maintain peak quality and safety. Beyond this period, texture and flavor may degrade, though they may still be safe if kept continuously frozen.
Always wrap them tightly in airtight packaging to prevent freezer burn and label with the date. Thaw them slowly in the refrigerator before consumption to preserve texture and food safety.
What Is the Best Way to Reheat Snack Sticks Without Drying Them Out?
The best way to reheat snack sticks without drying them out is to use a low, controlled heat source.
Wrap them loosely in foil to retain moisture. Warm in an oven set at 250°F (120°C) for 10-15 minutes.
Alternatively, use a microwave at 50% power in short intervals, turning them frequently.
Avoid high heat or direct exposure, which causes fat rendering and moisture loss, resulting in dryness.
Can I Substitute Meat Fat With Beef Fat in the Recipe?
You can swap meat fat with beef fat, but it’s not a one-to-one trade without consequences.
Beef fat has a higher melting point, so your snack sticks might be firmer and less juicy.
You’ll need to adjust grinding and smoking temperatures to prevent fat smearing or dryness.
Also, beef fat’s flavor is stronger and earthier, which will subtly shift your final product’s taste profile.
Test small batches before full substitution.
Are There Any Recommended Tools for Evenly Stuffing Casings at Home?
You’ll want to use a dedicated sausage stuffer to make sure even casing filling.
Vertical or horizontal hand-crank stuffers provide precise control, while electric models offer consistent pressure.
A funnel attachment helps direct the meat mixture smoothly into casings, minimizing air pockets.
Additionally, a sharp casing pricker assists in releasing trapped air.
Maintaining cold meat and steady pressure during stuffing also prevents irregularities, ensuring uniform stick density and appearance.
The Final Cut: Where Craftsmanship Meets Flavor
You’ve engineered a flavorful masterpiece, transforming raw cuts into perfectly seasoned snack sticks that smoke like aromatic ribbons curling through the air.
Each precise grind, measured spice, and careful casing fill is a calculated step toward culinary success.
As you slice into these savory rods, you open a mosaic of textures and flavors, a tribute to your methodical craftsmanship. Store them right, and your creation will remain a delicious equation, ready to satisfy future cravings.