Rub Recipe for Tri Tip: Simple Ingredients, Big Flavor
For a perfect tri-tip rub, combine kosher salt (½ tsp per pound), coarsely ground black pepper (about 1 tbsp), garlic and onion powders, smoked paprika, and 2 tsp brown sugar.
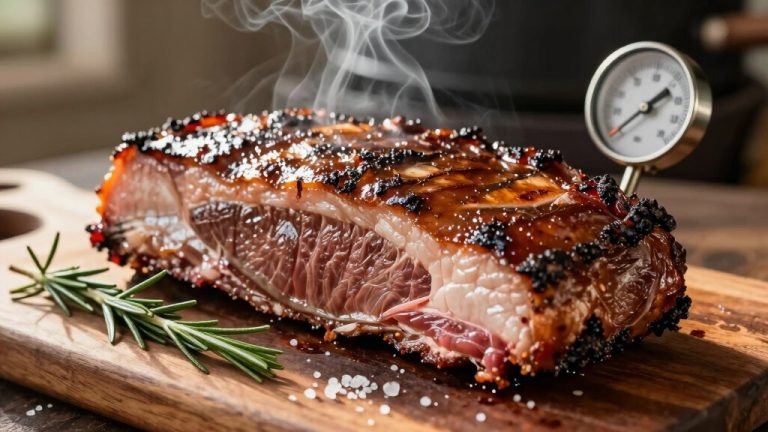
Mix thoroughly and apply 3–4 tablespoons per side, pressing firmly for an even crust. Let your meat rest 30 minutes to 24 hours for seasoning penetration, then cook low and slow or grill high heat for bark formation.
Keep going to explore application tips and cooking methods that maximize flavor.
Key Takeaways
- Use kosher salt (½ tsp per pound) and coarsely ground black pepper (~1 tbsp) as base seasoning for flavor and crust formation.
- Include garlic powder, onion powder, smoked paprika, and brown sugar (about 2 tsp each) for balanced umami, color, and mild sweetness.
- Mix spices thoroughly and apply 3–4 tablespoons per side, pressing firmly to develop a thick, flavorful crust on the tri-tip.
- Let rubbed tri-tip rest at least 30 minutes or refrigerate up to 36 hours for deeper flavor absorption before cooking.
- Store leftover rub in an airtight container in a cool, dark place to maintain freshness up to six months.
Essential Tri Tip Rub Ingredients and Steps – Quick Recipe Reference Table
| Ingredients / Tools | Steps / Actions |
|---|---|
| Kosher salt (½ tsp per lb) | Sprinkle evenly over meat; promotes moisture retention and flavor. |
| Coarsely ground black pepper (~1 tbsp) | Add for sharp bite and crust formation during searing. |
| Garlic powder (2 tsp) | Mix into rub for savory depth. |
| Onion powder (2 tsp) | Adds sweet-savory flavor. |
| Smoked paprika (2 tsp) | Provides mild smokiness and vibrant color. |
| Brown sugar (2 tsp) | Helps with crust formation and balances heat. |
| Chili powder or cayenne (optional, small pinch) | Adds mild heat if desired. |
| Dried rosemary / mustard powder (optional) | For aromatic notes and complexity. |
| Mixing bowl & airtight container | Combine all ingredients thoroughly; store for up to 6 months. |
| Patting cloth or paper towel | Dry meat surface before applying rub for better adhesion. |
| Application technique | Press 3–4 tablespoons per side firmly; cover all surfaces. |
| Resting time | Let rub penetrate 30 min–24 hours in the fridge before cooking. |
| Cooking method | Grill high heat or cook low-and-slow; slice against the grain. |
Essential Ingredients for a Tri Tip Rub

When crafting an effective tri tip rub, you’ll want to focus on a balanced blend of essential ingredients that enhance flavor, texture, and appearance.
Start with kosher or sea salt to boost flavor and retain moisture; its coarse grain guarantees even distribution and peak saltiness. Spritzing the meat during cooking can complement this by adding moisture and enhancing the rub’s flavor adherence.
Begin with coarse kosher salt to enhance flavor, lock in moisture, and ensure even seasoning throughout.
Add coarsely ground black pepper for a sharp bite and crust formation during searing.
Garlic and onion powders contribute concentrated umami and sweet-savory depth without moisture.
Incorporate paprika for mild sweetness, subtle smokiness, and vibrant color.
To introduce heat and complexity, use chili powder or cayenne sparingly, balancing with brown sugar to moderate intensity and promote Maillard browning. Tri tip is known for its good amount of marbling, which helps keep the meat tender and flavorful when paired with the right rub.
Finally, consider aromatic herbs like dried rosemary or mustard powder to add nuanced pine or tangy notes, rounding out your rub’s profile technically and flavor-wise. Using a vinegar-based spritz during cooking can further enhance the overall flavor and bark development.
Step-by-Step Rub Preparation
Let’s kick things off by grabbing some fresh, high-quality spices. It’s super important to measure them accurately so you get that balanced flavor just right. A well-balanced dry rub usually includes salt, sugar, and spices to enhance flavor and promote crust development.
Once you have everything, mix those ingredients thoroughly in an airtight container. Give it a good shake to ensure everything’s evenly distributed. Be sure to break apart the brown sugar with clean hands or a fork to prevent clumps before mixing to keep the rub smooth.
Now, when you’re ready to apply the rub, you’ll want to start by patting your tri-tip dry. This step is key! Drying the meat surface helps form a pellicle that allows the rub and smoke to adhere better.
After that, press the rub firmly and evenly onto all surfaces. This way, you’ll get that perfect seasoning penetration. Happy cooking!
Ingredient Selection Tips
Although selecting the right ingredients might seem straightforward, choosing specific salts, peppers, powders, and enhancers critically impacts your tri-tip’s final flavor and texture. Prioritize kosher or coarse sea salt for effective dry brining and crust formation. Freshly ground black pepper adds heat and complexity, essential in most rubs. Powdered alliums, like garlic and onion powder, deepen savory and sweet notes. Proper preparation and seasoning techniques can enhance the overall outcome by protecting and flavoring the meat surface with a polymerized oil layer.
Consider enhancers such as brown sugar for balance or cumin for a Southwest twist. It is important to avoid fresh garlic in the rub as it burns at grilling temperatures, creating acrid flavors.
- Salt: Use kosher salt at ½ teaspoon per pound for 12-24 hours refrigeration to optimize absorption and flavor. This salt absorption process is similar to the way seasoning helps build a protective layer on cooking surfaces.
- Pepper: Freshly ground black pepper, 1 tablespoon, imparts essential heat and complements salt.
- Enhancers: Brown sugar (2 teaspoons) tenderizes, while smoked paprika (2 teaspoons) boosts color and smokiness without burning. Applying spices evenly and allowing them to bond with the meat parallels the need to apply thin, even coats of oil during smoker seasoning for best results.
Mixing and Measuring
Several essential tools and techniques come into play during the mixing and measuring phase of your tri-tip rub preparation.
Start by selecting a small bowl or container to combine your dry ingredients. Use precise measuring spoons: tablespoons for paprika, chili powder, cumin, and brown sugar; teaspoons for cayenne, garlic powder, onion powder, and black pepper. Using food-grade materials during preparation ensures food safety and prevents contamination.
Break apart fresh dark brown sugar with your hands or a fork to prevent clumping and enhance blending. Whisk all seasonings thoroughly in the bowl, ensuring even distribution. The rub quantity prepared is generally sufficient for seasoning two tri-tip roasts, making it ideal for batch cooking or sharing.
For storage, transfer any extra rub into an airtight container or sealed jar, which preserves freshness for up to six months.
Prepare the rub immediately before application or the night prior to allow flavors to meld. Ideally, let it rest for 30 minutes after mixing for best integration.
Application Techniques
Before applying the rub, pat your tri-tip dry with a paper towel to remove excess moisture. This guarantees the seasoning adheres evenly without sliding off and promotes deeper spice penetration. Cleaning and preparing your grill properly beforehand ensures the best cooking environment for the meat and rub.
Follow these steps for optimal application:
- Apply Generous Amount: Sprinkle 3-4 tablespoons of rub per side, covering all surfaces thoroughly. This develops a thick, flavorful crust essential for a robust bark.
- Press and Pat Evenly: Use clean hands to firmly press the rub onto the meat. This ensures spices embed into the surface for uniform adhesion and no gaps.
- Allow Penetration Time: Let the rubbed tri-tip rest at least 30 minutes, or refrigerate up to 36 hours in a sealed bag. This facilitates flavor absorption and tenderization. The rub and olive oil help break down muscle fibers in this lean cut for tenderness and flavor.
These techniques maximize seasoning efficacy and enhance the tri-tip’s texture and taste while maintaining optimal cooking conditions.
Tips for Applying the Rub to Tri Tip
To get that perfect flavor on your tri-tip, you really want to sprinkle the rub generously all over it. Don’t be shy—use your clean hands to pat it in firmly on all sides. Make sure to flip the meat around so you coat it thoroughly. A good rule of thumb is to use about 3-4 tablespoons of rub per side.
This way, you’ll ensure a thick and tasty crust forms when you cook it. Because tri-tip is a triangular-shaped cut from the bottom sirloin, seasoning it evenly helps enhance its rich, beefy flavor. Allowing the rub to rest also helps develop the flavor crust during cooking.
Once you’ve got the rub on there, it’s a good idea to let the tri-tip rest in an airtight container for at least 30 minutes. This resting time helps the seasonings really penetrate the meat and allows the rub to stick properly. Trust me, your taste buds will thank you!
Even Coverage Techniques
When applying rub to tri-tip, ensuring even coverage starts with properly preparing the meat’s surface by patting it dry and salting both sides to draw out moisture. This dry brine step promotes adhesion and flavor penetration. Dry brining with Kosher salt overnight can deepen seasoning and improve texture. Resting the meat after applying the rub allows for moisture redistribution and better flavor absorption. Next, apply the rub generously—about 3-4 tablespoons per side—making sure to cover every surface, including edges.
Use clean hands to pat the rub firmly onto the meat, avoiding contamination by designating one hand for the rub and the other for the meat.
- Use a shaker for uniform sprinkling and avoid clumps.
- Rub spices into all surfaces, pressing to adhere fully.
- Seal the rubbed tri-tip in a plastic bag for consistent exposure.
These techniques guarantee an even, flavorful crust that enhances your tri-tip.
Optimal Resting Time
Although applying the rub is essential for flavor, allowing your tri-tip to rest properly after seasoning and cooking guarantees juices redistribute and flavors fully develop.
After smoking, pull the tri-tip at about 120°F internal temperature to let carryover heat raise it to 130°F for medium-rare doneness. Rest it a minimum of 15 minutes on a cutting board, loosely covered with foil, to lock in juices and avoid moisture loss when slicing. Smoking at 180F requires about 1 hour per pound, so plan your timing accordingly. For longer holds, consider using the cooler holding method to maintain temperature safely without drying the meat.
For extended holding, maintain 130–140°F in a cooler, monitoring closely to prevent overcooking. Apply the dry rub with a binder beforehand and rest the meat overnight wrapped in plastic for optimal rub adhesion.
Avoid slicing immediately post-rest; instead, slice against the grain to preserve texture and maximize tenderness.
Recommended Resting and Marinating Times

Since proper resting and marinating directly impact tri-tip’s flavor and juiciness, understanding their ideal durations is essential.
For resting, allow 10–15 minutes after cooking to enable carryover cooking and juice redistribution. Tent loosely with foil to retain heat without excess steam loss. This resting period typically allows the internal temperature to rise about 10°F, enhancing tenderness and flavor. For longer resting periods, consider wrapping the meat to maintain moisture and prevent temperature loss.
Marinating times vary by method and ingredients, affecting flavor penetration and texture.
- Resting: Smaller tri-tips (1–2 lb) need ~10 minutes, larger cuts up to 15. Avoid resting under 10 minutes to reduce juice loss.
- Extended Holding: If holding over 30 minutes, maintain temperature above 140°F minimum or cool below 40°F to assure food safety.
- Marinating: Apply dry rub 2–24 hours before cooking. Wet marinades require 3–5 hours to impart flavor without over-tenderizing.
Cooking Techniques to Enhance the Rub Flavor
Mastering cooking techniques markedly enhances the flavor impact of your tri-tip rub by optimizing surface interaction and thermal effects.
Begin by scoring the fat cap to promote deeper rub penetration and even flavor distribution. Apply a thin binder like mustard to improve adhesion and crust development. Maintaining a steady temperature during cooking is essential to ensure even heat penetration and consistent results.
Layer kosher salt first to draw moisture, enhancing crystallization. Massage the rub firmly to maximize mechanical transfer.
Timing matters: immediate application yields a crisper crust; longer rest increases flavor uptake. Use coarse salts and peppers for textured crusts and slower diffusion.
High-heat grilling triggers Maillard reactions and rapid caramelization, intensifying crust flavors but risking burns with sugary rubs.
Alternatively, low-and-slow smoking fosters gradual fat rendering and smoke absorption, deepening flavor integration. For best results, cook the tri-tip at a low-and-slow temperature of 250–275°F (120–135°C) to tenderize and infuse flavors.
The reverse-sear method combines these benefits, setting flavors before final crust formation. Employing temperature consistency throughout these methods helps achieve optimal tenderness and flavor balance.
Storage and Shelf Life of Homemade Rubs

When storing your homemade rubs, choosing the right container greatly impacts their longevity and flavor retention.
Glass jars with airtight lids are ideal due to their non-porous nature and superior seal, preventing moisture and air exposure.
Amber-colored glass jars further protect rubs from light degradation, preserving potency. To maximize shelf life, consider these key factors:
- Temperature: Store rubs consistently at 65-70°F in a cool, dark pantry or drawer, away from heat sources and humidity fluctuations.
- Container: Use airtight, preferably amber glass jars; avoid plastic or resealable bags unless on a budget.
- Humidity and Light: Keep rubs away from moisture, light, and heat; add rice grains to absorb residual moisture and prevent clumping.
Under these conditions, ground spices last 1–2 years with peak flavor retention.
Frequently Asked Questions
Can I Use a Tri-Tip Rub on Other Cuts of Beef?
You can definitely use a tri-tip rub on other beef cuts like flap steak, skirt, flank, bavette, or chuck.
Adjust cooking times and techniques based on the cut’s thickness and toughness. For thinner cuts, reduce grill time and slice against the grain.
Use binders to help the rub stick and form a crust. Be mindful of salt levels for leaner cuts to avoid over-seasoning, ensuring peak flavor and texture.
What Type of Wood Pairs Best With Tri-Tip for Smoking?
Think of wood smoke as the paintbrush adding flavor strokes to your tri-tip canvas.
For smoking tri-tip, mild fruitwoods like apple or cherry offer a delicate, sweet whisper that enhances beef without shouting.
If you prefer bolder notes, hickory or a hickory-oak blend delivers a rich, earthy backbone.
Pecan, especially mixed with oak or cherry, balances nutty and sweet tones.
Choose based on your desired smoke intensity and cooking duration.
Is Tri-Tip Traditionally Served With Any Specific Side Dishes?
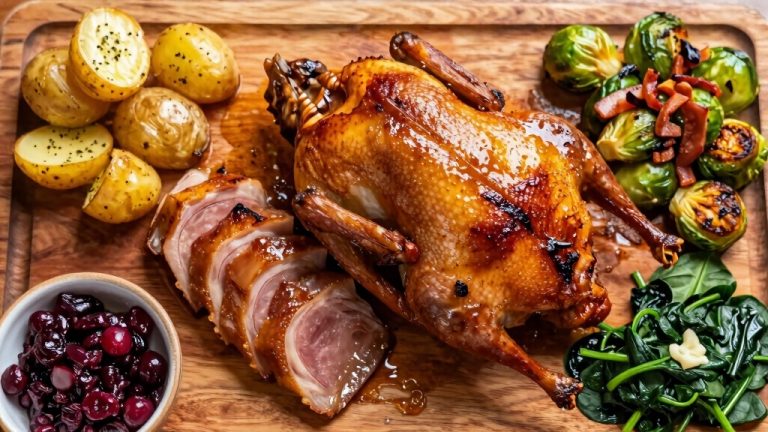
Yes, tri-tip traditionally comes with specific sides. You’ll often find it paired with pinquito beans and grilled garlic bread, especially in Santa Maria-style barbecue.
Fresh salsa or salsa fresca adds acidity and brightness. For veggies, grilled asparagus or green beans work well.
Hearty sides like mashed potatoes or roasted root vegetables commonly accompany tri-tip too. Don’t forget chimichurri or herb-infused butters to complement the meat and sides perfectly.
How Do I Adjust the Rub for a Spicier Flavor?
To spice up your rub, swap milder chili powders with cayenne or ground chipotle, increasing cayenne by 0.25–0.5 tsp per batch.
Add crushed red pepper flakes for texture and heat. Balance heat with 1–2 tbsp sugar per ½ cup rub to prevent harshness.
Incorporate garlic, cumin, or smoked paprika for depth. Measure spices precisely and test small samples before full application to insure flavor balance and desired heat level.
Can I Prepare the Tri-Tip Rub in Advance and Freeze It?
Definitely, you can prepare the tri-tip rub in advance and freeze it, locking flavors like a time capsule.
The dry mix of spices and sugars resists moisture, making it freezer-friendly without losing potency.
Store it airtight to prevent clumping or flavor loss.
When ready, thaw overnight in the fridge or at room temperature before applying.
This method guarantees your rub stays fresh, convenient, and ready to elevate your tri-tip anytime.
Take Your Tri Tip to the Next Level with This Rub
By mastering your tri tip rub, you’re tapping into a flavor boost that 72% of grill enthusiasts swear by for juicier, more savory meat. Applying your rub evenly and allowing at least an hour of marination optimizes seasoning absorption.
Remember, precise timing and technique elevate your tri tip from good to exceptional.
Store your homemade rub properly to maintain potency, ensuring every cook delivers consistent, mouthwatering results. Keep experimenting to perfect your signature blend.