How to Cook Picanha: Tips, Temps, and Mistakes to Avoid
Choose a 2–3 pound picanha with a thick fat cap and dry surface. Trim excess fat but keep about 1.5 cm to guarantee juiciness.
Bring the meat to room temperature and pat dry before seasoning generously with coarse salt.
Grill fat side down over moderate heat to render fat and form a crust, then sear the meat side briefly.
Let it rest before slicing against the grain for tenderness. Keep going to master roasting techniques and precise carving.
Key Takeaways
- Select a 2-3 pound picanha with a thick fat cap of at least 1.5 cm for optimal flavor and tenderness.
- Trim excess fat only if thicker than 1.5 cm, then pat the meat dry and bring to room temperature.
- Season generously with coarse rock salt to enhance the natural beef flavor before cooking.
- Grill fat side down over moderate heat for 6–8 minutes to render fat, then sear the meat side for crust.
- Rest the meat before slicing against the grain into 1.5-inch thick cuts for maximum juiciness and tenderness.
Picking the Perfect Picanha Cut

Start by selecting a picanha cut that weighs between 2 to 3 pounds, as this range guarantees the meat is tender and avoids tougher sections.
Choose a picanha cut weighing 2 to 3 pounds to ensure tenderness and avoid tough meat sections.
Look for a triangular or crescent-shaped cut with a thick fat cap measuring at least 1.5 cm. This fat layer is vital for rendering and flavor development during cooking.
Make certain the meat surface is dry, and fat concentrates mostly in the cap, not marbled throughout. The cut should come from the rump cap muscle, located at the top of the hindquarter, exhibiting some intramuscular marbling for added succulence.
Avoid cuts with uneven fat thickness or excessive moisture, which impede crust formation. By choosing a well-structured, properly sized picanha, you set the foundation for prime flavor and texture during cooking.
Although the picanha is prized for its fat cap, understanding the muscle origin helps ensure selection of a tender, flavorful cut.
Preparing Picanha: Trimming Fat and Seasoning
Trim the fat cap on your picanha only if it exceeds the ideal thickness of 1.5 cm. Maintaining this layer is essential for flavor and juiciness during cooking.
Before seasoning, let the meat reach room temperature and pat it dry to guarantee a proper crust forms. Use minimal seasoning to highlight the meat’s natural taste.
Follow these steps for preparation:
- Assess fat thickness; trim excess beyond 1.5 cm carefully.
- Bring meat to room temperature for even cooking.
- Dry surface thoroughly to prevent steam and promote Maillard reaction.
- Season generously but simply with coarse rock salt for traditional flavor.
This precise preparation sets the foundation for an authentic and flavorful picanha. Patting the meat dry and salting it helps create a pellicle that improves rub and smoke adhesion.
Grilling Picanha Fat Side Down for Juicy Flavor
When grilling picanha, placing the cut fat side down first is essential to render the fat cap properly and develop a crispy, flavorful crust.
Start with a well-heated grill and position the picanha so the fat contacts the grates directly. This allows the fat to melt gradually, basting the meat and creating a golden, crunchy exterior.
Maintain moderate, direct heat to avoid burning while ensuring full fat rendering. After 6–8 minutes, flip the cut to sear the meat side briefly, locking in juices.
Using skewers keeps the picanha stable and helps expose the fat evenly to the flame. This technique maximizes juiciness and flavor by utilizing the fat cap’s natural moisture and fat content during grilling.
For optimal tenderness and juiciness, consider wrapping during the stall if cooking thicker cuts over indirect heat to retain moisture and accelerate cooking.
Roasting Picanha Low and Slow With a Crispy Finish
Grilling picanha fat side down highlights the fat cap’s ability to baste the meat. Roasting low and slow offers a different approach to tenderness and flavor development.
When you roast picanha, keep the fat cap intact to insulate the meat, preserving moisture and enhancing richness.
Keeping the fat cap intact during roasting insulates the meat, locking in moisture and boosting flavor richness.
Start by bringing the meat to room temperature and patting it dry. Then, roast at a low temperature (around 250°F) until the internal temperature reaches 120°F for medium-rare.
Finish with a high-heat sear to crisp the fat. Focus on these steps:
- Maintain fat cap thickness for prime basting.
- Use a precise low-temperature oven setting.
- Monitor internal temperature carefully.
- Apply a final sear for texture contrast.
This method guarantees even cooking and a tender, juicy result. For optimal tenderness, consider that collagen breakdown occurs gradually and is influenced by both temperature and time.
Slicing and Serving Picanha for Maximum Tenderness
To maximize tenderness, always slice picanha against the grain immediately after resting. Resting allows the juices to redistribute, preventing moisture loss when you cut.
Identify the muscle fibers running lengthwise and position your knife perpendicular to them. Use a sharp carving knife to create slices about 1.5 inches thick; this thickness maintains steakhouse presentation and guarantees each piece retains juiciness.
If you prefer leaner bites, trim some of the rendered fat cap post-slicing without discarding it entirely, as it contributes flavor and moisture. Serve the slices promptly to preserve peak texture and warmth.
Proper slicing technique is essential because picanha’s low intramuscular fat makes it prone to toughness if cut incorrectly or too early. Follow these steps to deliver a tender, flavorful experience every time.
For best results, monitor the internal temperature carefully with a digital leave-in probe to ensure precise doneness and avoid overcooking.
Frequently Asked Questions
Can I Freeze Picanha Before Cooking Without Losing Quality?
Yes, you can freeze picanha before cooking without losing quality if you do it properly.
Make sure to wrap it tightly in plastic wrap, then seal it in an airtight freezer bag to prevent freezer burn and moisture loss.
Thaw it slowly in the refrigerator before cooking to maintain texture and flavor.
Avoid quick thawing methods, as they can cause uneven moisture loss and affect the fat cap’s rendering and overall juiciness.
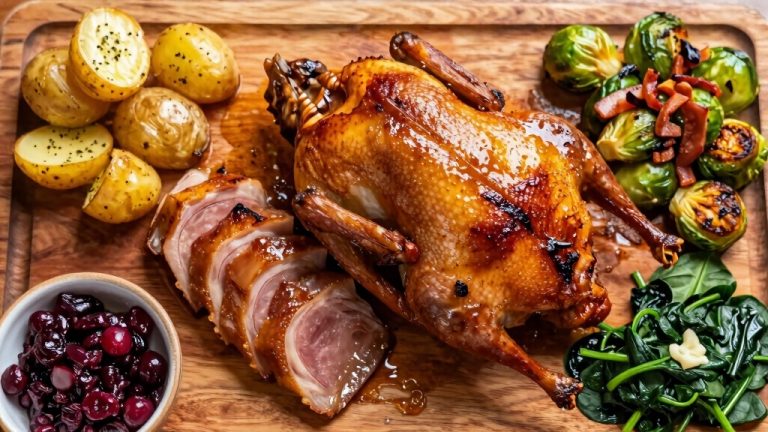
What Is the Best Side Dish to Serve With Picanha?
You’d want to pair picanha with classic sides that complement its rich, buttery fat cap and savory flavor. Think grilled vegetables or a simple chimichurri sauce to cut through the richness.
Roasted potatoes or farofa, a toasted cassava flour mixture, work wonders. Think of it as a Renaissance feast: robust, balanced, and harmonious.
Keep sides light and acidic to contrast the steak’s juicy texture, ensuring every bite stays exciting and well-rounded.
How Long Should Picanha Rest After Cooking?
You should let picanha rest for about 10 to 15 minutes after cooking.
This resting period allows the juices to redistribute evenly throughout the meat, ensuring maximum tenderness and juiciness when sliced.
Cover the meat loosely with foil to retain warmth without steaming the crust.
Resting also helps the thick fat cap maintain its buttery texture while the internal temperature stabilizes, preventing juice loss during carving.
Can Picanha Be Cooked Sous Vide Before Grilling?
Yes, you can cook picanha sous vide before grilling.
Set your sous vide bath to 130°F (54°C) for medium-rare and cook the picanha for 2 to 4 hours to evenly tenderize the meat.
Afterward, pat it dry to guarantee a good sear, then grill fat-side down over high heat to crisp the fat cap and develop a flavorful crust.
This method preserves juiciness and enhances texture.
What Internal Temperature Indicates Perfectly Cooked Picanha?
You’ll want to aim for an internal temperature between 130°F (54°C) and 135°F (57°C) for medium-rare picanha, which preserves tenderness and juiciness.
For medium, target 140°F (60°C). Use a reliable meat thermometer inserted into the thickest part, avoiding the fat cap.
The Final Slice: Your Guide to Flawless Picanha Success
Remember, “patience is a virtue” when cooking picanha. By choosing the right cut, trimming the fat properly, seasoning thoughtfully, and grilling fat side down, you lock in juiciness and flavor.
Whether you roast it low and slow or slice it carefully after cooking, these steps guarantee tender, flavorful results every time. Follow these techniques precisely, and you’ll master picanha preparation with consistent, mouthwatering success.