How Do You Season a New Smoker? Easy Steps to Follow
To season your new smoker, start by thoroughly cleaning all parts with mild soap, removing grease and residues. Once dry, apply a thin, even coat of high smoke point oil like canola or grapeseed inside the smoker.
Gradually heat it to around 250°F for several hours, allowing the oil to bond and build a protective, rust-resistant layer. Adding hardwood smoke enhances flavor and surface protection.
Keeping this process consistent guarantees your smoker lasts longer and performs better; there’s more to mastering its care.
Key Takeaways
- Clean the smoker thoroughly, removing all packaging residues, dirt, and grease before starting the seasoning process.
- Apply a thin, even coat of high smoke point, neutral-flavored oil to all interior surfaces when the smoker is cool and dry.
- Heat the smoker gradually to around 250°F–275°F for 2–4 hours to cure and polymerize the oil evenly.
- Add hardwood chunks halfway through heating to create smoke that bonds with the oil, enhancing flavor and protective coating.
- After seasoning, maintain by wiping with oil, cleaning grates, drying completely, and reheating at 225°F–400°F for 2–3 hours regularly.
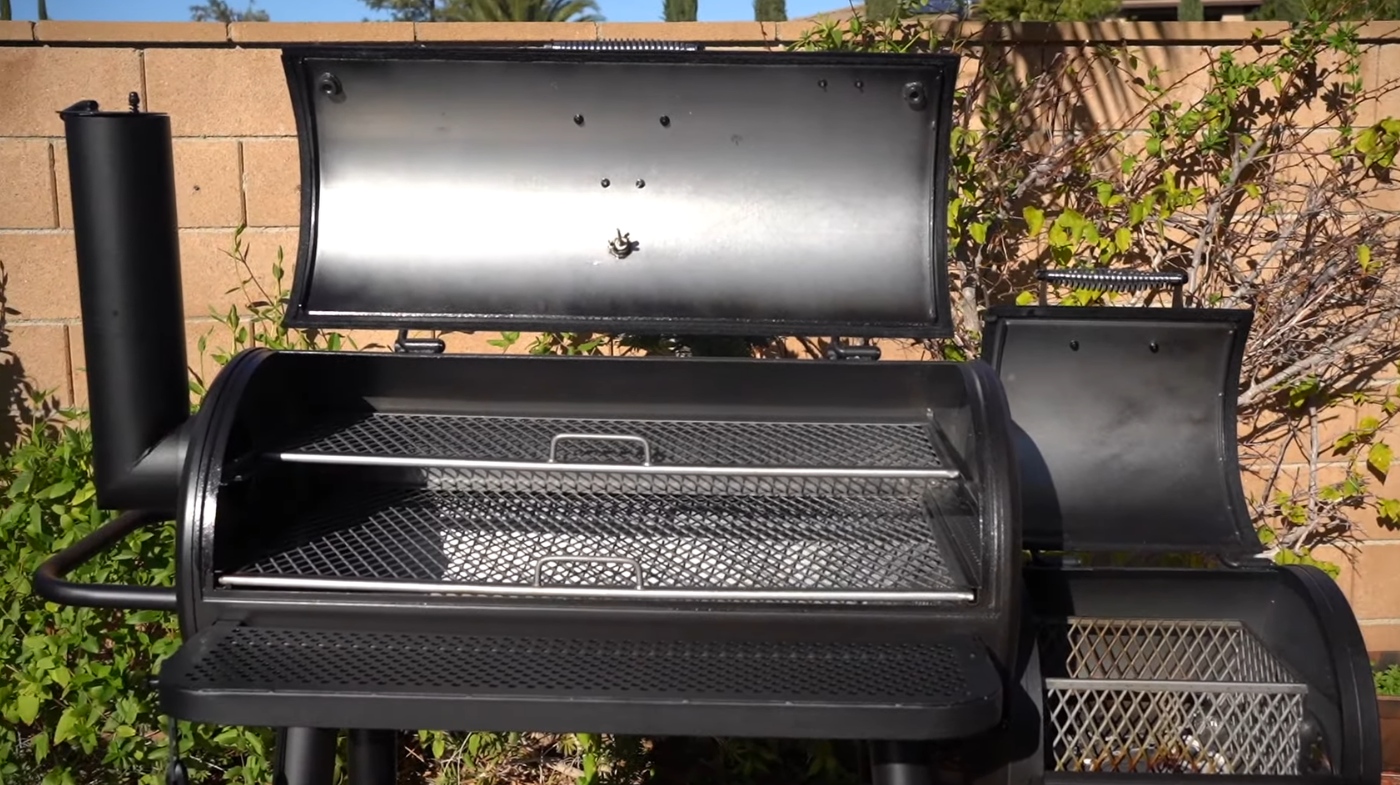
Preparing Your New Smoker for Seasoning
Before you begin seasoning your new smoker, you’ll want to make certain proper ventilation and airflow by fully opening all vents, dampers, and smoke stacks.
This maximizes oxygen flow, essential for reaching the high temperatures needed to burn off factory residues efficiently. Opening doors and lids further improves airflow, preventing smoke buildup and promoting a cleaner burn.
This initial step also helps to remove odors absorbed during manufacturing such as paints and adhesives, ensuring no contamination of food during future use.
Next, apply a thin, even coat of high smoke point oil—like canola or avocado—to all interior surfaces, including racks and walls. This oil layer protects metal from rust and forms a base for future flavor absorption.
Finally, heating the smoker gradually to about 375-400°F (190-205°C) for several hours will remove manufacturing oils and solvents, while letting you familiarize yourself with vent adjustments and temperature control before cooking.
Cleaning All Components Thoroughly
You’ll want to remove all racks, grates, and pans before washing to guarantee every surface is free of manufacturing residues and oils.
Use mild soap and a grill brush to scrub away any grease or particles without damaging the finish. Thoroughly rinsing and air drying these parts prevents off-flavors and rust during seasoning.
Proper drying also helps avoid corrosion and moisture buildup that can affect the smoker’s longevity. Regular cleaning is crucial because grease buildup can cause unpleasant, burnt-tasting meat and even pose safety hazards.
Removing Residues Completely
How do you guarantee every bit of residue is removed from your new smoker? Start by power washing with cold water to eliminate loose debris, focusing on greasy and grimy spots without damaging metal surfaces. Follow this with scraping using flat tools to tackle stubborn buildup.
Because cigarette smoke residue can be yellowish-brown and gluey, it requires careful removal to avoid lasting damage. It’s important to maintain temperature control during cleaning to protect sensitive components of your smoker.
Next, scrub all interior parts from top to bottom using hard-bristled brushes, rinsing thoroughly afterward.
Employ natural cleaners like baking soda paste or vinegar solutions for tough grease, and consider specialized tools such as ash vacuums and smoker-specific scrapers to protect surfaces.
Finally, dry the smoker completely by tilting and heating it gently to prevent rust before seasoning.
- Power wash and scrape all greasy areas
- Scrub with stiff brushes and rinse thoroughly
- Use natural or chemical cleaners on stubborn spots
- Utilize specialized tools to protect surfaces and remove ash
Washing Racks and Surfaces
Since thorough cleaning guarantees ideal performance and longevity, focus on washing all racks and surfaces meticulously.
Start by removing racks and soaking them in hot, soapy water to loosen grease. Use a soft brush or non-abrasive pad to scrub corners and joints, avoiding harsh scrubbers that can scratch surfaces.
This step is particularly important because different smoker types require tailored cleaning routines due to varying residue accumulation. Proper cleaning also helps prevent buildup of resinous smoke residue that can affect flavor and smoker function.
For tough grime, apply a baking soda paste or a lemon juice and salt scrub. Wipe the smoker’s interior with a vinegar-and-water solution, removing ash and grease drip pan residue carefully.
Rinse all parts thoroughly with warm water, then air dry completely or use a clean cloth for hard-to-reach spots. Ensure no cleaning residue remains, as moisture or soap can interfere with seasoning and promote rust. Only reassemble your smoker once every component is fully dry.
Choosing the Right Oil for Coating
When seasoning your new smoker, selecting an oil with a high smoke point is essential to forming a durable, protective coating.
Oils with smoke points above 400°F polymerize properly, creating a hard, long-lasting layer that shields metal surfaces. This process extends the lifespan of the smoker by protecting it against rust and corrosion.
Proper seasoning also helps improve heat retention by creating a smoother surface that reduces corrosion-related heat loss.
Choose refined oils like avocado, canola, or grapeseed to avoid residue and unpleasant flavors. Some enthusiasts also use red palm or sunflower oil for their suitable smoke points.
Consider these points when selecting your oil:
- Use neutral-flavored, edible oils to prevent flavor transfer.
- Avoid low smoke point oils; they burn off and fail to protect.
- Rendered animal fats (e.g., lard, bacon grease) add seasoning flavor but require thin application.
- Test oils on a small area first to ensure compatibility and desired results.
Applying Oil to the Smoker Interior
Start by selecting a high-smoke-point oil, like grapeseed or refined canola, to guarantee a durable, odorless coating.
Apply the oil evenly with a spray bottle or clean cloth, focusing on thin, controlled layers to avoid sticky buildup. This method helps preserve the monounsaturated fats in the oil, which contribute to a resilient seasoning layer. Make certain to coat all interior surfaces thoroughly for ideal protection and seasoning.
Choosing Appropriate Oils
Although seasoning a smoker interior requires careful attention, choosing the right oil is essential to developing a durable, rust-resistant coating. You’ll want oils with a high smoke point (above 400°F) to ensure proper polymerization and a lasting protective layer.
Refined avocado, canola, and grapeseed oils are top choices for their heat tolerance and neutral flavors. These oils also help in moisture retention, which is crucial for maintaining the smoker’s interior during cooking cycles.
Traditional animal fats like bacon grease or lard add smoky aroma and seasoning benefits but require careful handling.
Consider these factors when selecting your oil:
- High smoke point oils withstand smoker temperatures without breaking down
- Neutral-flavored oils avoid imparting unwanted tastes
- Animal fats provide authentic smoke aroma but can be messier
- Consistent use of the same oil type maintains seasoning integrity over time
Choosing the appropriate oil also helps to enhance durability and longevity of the smoker by forming a protective coating during seasoning. Choose wisely to optimize your smoker’s seasoning and longevity.
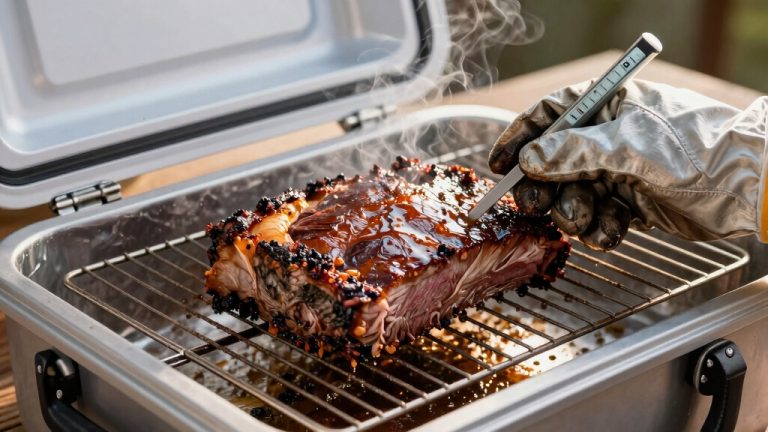
Proper Application Techniques
Because thorough preparation guarantees ideal seasoning, you must clean and dry every interior surface before applying oil. Remove dust, manufacturing residues, and packaging, then air dry completely to make sure oil adheres properly without trapping moisture.
Proper environmental control is essential to prevent accidental ignition and ensure safety during this process. Disassemble removable parts for full access, especially corners and crevices prone to rust.
Use a spray bottle or cooking spray for an even, thin coat—heat the oil slightly to improve flow. Avoid over-application; wipe off any excess to prevent sticky buildup. Coat all interior surfaces: firebox, walls, grates, baffles, and lid, extending slightly beyond edges.
Applying oil creates a protective barrier that guards against corrosion and residue buildup. Apply oil only when the smoker is cool and dry, in a well-ventilated space.
Let the oil absorb briefly before starting the initial low-temperature burn-in to polymerize and protect the metal evenly. This burn-in benefits from propane’s higher combustion temperature to create a durable seasoning layer.
Setting the Temperature for Initial Heating
When seasoning a new smoker, you’ll want to carefully control the initial temperature to prevent metal warping and guarantee an even cure.
Start by warming up slowly, avoiding rapid changes that stress the metal. Maintaining a steady temperature lets you burn off factory oils uniformly, protecting the smoker’s surfaces and ensuring a consistent burn rate.
Keep these guidelines in mind:
- Hold about 250°F for 4 hours for initial heating.
- For digital smokers, set between 250°F and 275°F for 2–3 hours.
- Offset smokers require 300°F to 350°F for 1–2 hours, with careful vent adjustment.
- Gradually increase temperature; avoid exceeding 600°F to preserve seasoning oils.
This process also helps to remove manufacturing residues like oils, dust, and odors, ensuring that your smoker is clean and ready for optimal smoking flavors.
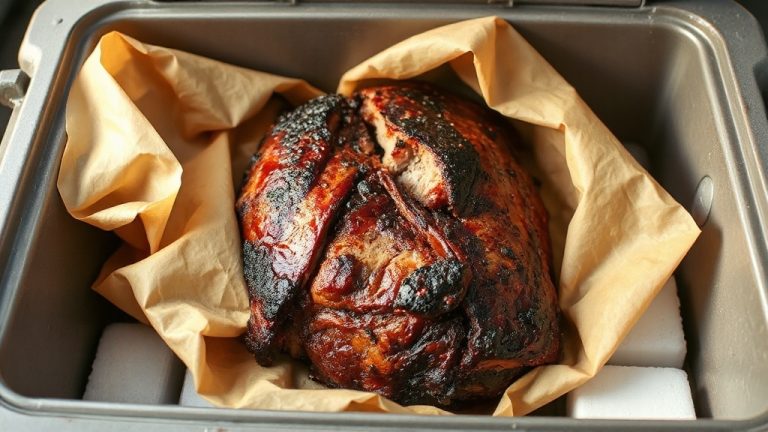
Using Smoke to Build Flavor and Protect Surfaces
As you season your new smoker, introducing smoke at the right stage plays a crucial role in building both flavor and a protective surface layer.
After cleaning and oiling the interior with a high smoke point oil like canola, begin your heating cycle. It is important to gradually heat the smoker to around 300°F to ensure the oil properly bonds with the metal surfaces.
Add hardwood chunks—hickory, oak, or mesquite—about halfway through to generate clean, flavorful smoke for 2 to 3 hours. Using hardwood pellets or chunks helps maintain a clean burn that preserves aroma and prevents harsh residues.
This smoke bonds with the oil coating, forming a hard, polymerized layer that guards against rust, cures residual finishes, and enhances heat distribution.
Keep vents open per manufacturer instructions to guarantee proper airflow and avoid creosote buildup by monitoring smoke density. Avoid resinous woods, as their harsh smoke can damage surfaces.
Maintaining and Re-Seasoning Your Smoker Over Time
Maintaining your smoker’s seasoned surface is essential to preserve its performance and longevity over time. Regular cleaning, inspection, and re-seasoning prevent rust and ensure consistent cooking results.
After each use, wipe the interior with a thin layer of high-smoke-point oil like canola or grapeseed.
When the seasoning shows wear, follow these steps:
- Thoroughly clean grates and interior with hot water and a gentle scrub; avoid harsh chemicals.
- Dry completely to prevent moisture-related rust.
- Apply a thin, even coat of food-grade oil to all metal surfaces.
- Heat the smoker at 225°F–400°F for 2–3 hours to polymerize the oil into a durable coating.
Frequently Asked Questions
Can I Season My Smoker Outdoors in Cold or Humid Weather?
You can season your smoker outdoors in cold or humid weather, but expect longer heat-up times and temperature fluctuations.
Use oils with high smoke points like canola or avocado to guarantee proper seasoning. Position your smoker in a sheltered spot to minimize wind chill, monitor fuel closely, and avoid opening the lid often.
Preheat gradually and plan for extended seasoning—3 to 4 hours—to compensate for moisture and heat loss challenges.
Is It Safe to Season a Smoker Indoors or in an Enclosed Space?
Seasoning a smoker indoors is like trying to tame a wild beast in a glass cage—it’s risky and unwise. You shouldn’t do it because smoke and fumes build up quickly, triggering alarms and harming your lungs.
Plus, high heat and oil vapors increase fire danger in confined spaces. Always season your smoker outdoors where ventilation disperses smoke safely, protecting your home and health while ensuring a smooth, effective seasoning process.
How Long Should I Wait After Seasoning Before Cooking Food?
You should wait at least 1-2 hours after your smoker has fully cooled before cooking. This allows any chemical odors and off-flavors from seasoning to dissipate, ensuring food safety and flavor quality.
Some pitmasters prefer seasoning a day prior to the first cook, letting the smoker rest overnight for thorough stabilization. Always confirm your smoker’s internal temperature is safe and that all packing materials have been removed before cooking.
Can I Use Flavored Wood Chips During the Initial Seasoning?
Sure, you could douse your new smoker in mesquite and hickory right away, turning it into a smokehouse nightmare that ruins all future cooks. But if you want your food to shine, stick to lighter woods like oak or applewood during initial seasoning.
Add wood chips late in the cycle to gently banish factory odors without overpowering your smoker’s flavor profile. That way, you’ll get a clean, subtle foundation for every delicious smoke session.
What if My Smoker Starts Smoking Excessively During Seasoning?
If your smoker smokes excessively during seasoning, first check your oil application—too much or low smoke-point oil burns heavily. Lower the temperature to just above the oil’s smoke point and avoid sudden spikes.
Confirm good airflow by adjusting vents for steady, moderate flow to encourage clean combustion. Also, verify your fuel quality; poor pellets or wood increase smoke. Finally, inspect for leaks or unsealed joints that disrupt airflow and cause thick smoke.
Seal the Flavor: Season Right, Smoke Better
Seasoning your new smoker properly is essential for peak performance and flavor. Did you know that a well-seasoned smoker can reduce food sticking by up to 70%?
By thoroughly cleaning, applying the right oil, and gradually heating, you create a protective, non-stick layer that enhances smoke absorption and durability.
Keep re-seasoning regularly to maintain this barrier, ensuring every cook delivers consistent, smoky perfection. Your smoker’s longevity and your culinary results depend on it.