Brine for Smoking Salmon Recipe: Foolproof Beginner Recipe
To brine salmon for smoking, dissolve ½ cup kosher salt and ½ cup brown sugar per quart of warm water.
Cool the brine fully before submerging your fish.
Keep salmon refrigerated, fully immersed for 4 to 20 hours depending on thickness. Thinner fillets need less time, while thick whole sides need more.
Pat dry after brining to form the essential pellicle, which enhances smoke adhesion and flavor.
Mastering these steps guarantees balanced taste and texture. Exploring further reveals ideal times, additives, and smoking tips.
Key Takeaways
- Use a brine of 1/2 cup kosher salt and 1/2 cup brown sugar per quart of water for balanced flavor and texture.
- Dissolve salt and sugar in warm water, then cool brine to refrigerator temperature before adding salmon.
- Fully submerge 2–3 inch thick salmon fillets in chilled brine and refrigerate for 4–8 hours depending on thickness.
- Pat salmon dry after brining and air-dry uncovered for 2–3 hours to form a pellicle for better smoke adhesion.
- Keep brining under 48 hours to avoid overly salty or tough texture, and refrigerate throughout for food safety.
Brine for Smoking Salmon: Recipe Table
| Main Term | Key Action | Details |
|---|---|---|
| Salmon | Select cut | Use skin-on fillets, steaks, or whole side |
| Kosher salt | Primary curing agent | ½ cup per quart water |
| Brown sugar | Balance saltiness | ½ cup per quart water |
| White sugar | Optional sweetness | ¼ cup optional |
| Warm water | Dissolve brine | Fully dissolve salt + sugar |
| Cooling brine | Food safety | Chill completely before adding salmon |
| Brining | Refrigerate | Keep salmon fully submerged |
| Thin fillets | Brine time | 4–6 hours |
| Medium steaks | Brine time | 6–8 hours |
| Whole side salmon | Brine time | 12–20 hours |
| Max brining limit | Avoid over-curing | Never exceed 48 hours |
| Drying | Pellicle formation | Pat dry, air-dry 2–3 hours |
| Pellicle | Smoke adhesion | Sticky surface helps smoke stick |
| Smoking temp | Cook setting | 250°F |
| Wood choice | Flavor | Alder or hickory |
| Moisture control | Smoker tip | Use water pan |
The Importance of Brining Salmon

Although brining may seem like an extra step, it plays a crucial role in preparing salmon for smoking by enhancing flavor, improving texture, and ensuring proper preservation.
When you brine, the salt penetrates the fish, firming the flesh and preventing it from drying out during smoking. The sugar balances the saltiness and promotes caramelization, contributing to a nuanced taste and appealing color.
You’ll notice that a properly brined salmon develops a firmer, more resilient texture, which holds up well to handling and heat. Additionally, brining inhibits bacterial growth, extending shelf life.
For best results, controlling surface moisture on the salmon before smoking is essential to optimize flavor absorption and texture.
Making the Perfect Basic Salmon Brine
To make the perfect basic salmon brine, start by mixing together kosher salt, brown sugar, and water in specific ratios. This combination creates a balanced brine that not only firms up the salmon but also enhances its flavor.
Now, here’s a little tip: make sure to fully dissolve the salt and sugars in warm water. This step is crucial! Once everything is dissolved, let the solution cool down before you add the fish. This way, you avoid partially cooking the salmon.
When it comes to brining time, aim for about 4 to 8 hours. Of course, you can adjust that based on the thickness of your salmon. This way, you’ll achieve that perfect texture and seasoning you’re looking for. Happy brining!
For best results, always use non-reactive containers to ensure the brine does not react with the fish or affect the flavor.
Essential Brine Ingredients
When crafting the perfect basic salmon brine, you need to balance salt, sugar, and water precisely to guarantee proper curing and flavor development.
Start with kosher salt, about 1/2 cup per quart of water, to ensure adequate salinity without overpowering. Brown sugar, typically 1/2 cup, provides sweetness that counterbalances saltiness and promotes browning during smoking.
Adding a smaller amount of white sugar, around 1/4 cup, enhances sweetness complexity and aids in moisture retention. Use warm water to dissolve ingredients completely, but cool the brine before adding salmon to prevent premature cooking.
This precise ratio controls osmotic pressure, extracting moisture while infusing flavor evenly. Avoid deviations that could cause over-salting or under-curing, guaranteeing your salmon attains peak texture and taste before smoking.
For best results, use pure kosher salt to avoid off-flavors and ensure even curing throughout the fish.
Brine Preparation Steps
Before you add the salmon, dissolve the salt and sugars completely in warm water to guarantee even curing. This assures the brine penetrates uniformly, enhancing flavor and texture. Use a whisk or fork to stir until no granules remain.
Follow these precise steps for your brine preparation:
- Combine kosher salt, brown sugar, and white sugar in warm water; stir until fully dissolved.
- Cool the brine to refrigerator temperature before adding salmon to prevent premature cooking and uneven curing.
- Optionally, add herbs or spices for flavor complexity, ensuring they’re well mixed.
Accurate dissolution and cooling are critical. Skipping these compromises the brine’s effectiveness, potentially yielding inconsistent results. Always refrigerate the brine and fish during curing to maintain safe curing temperatures and control salt absorption.
Brining Duration Guidelines
Although brining times vary depending on salmon thickness and recipe specifics, understanding ideal durations guarantees balanced curing and flavor development.
For most fillets, 4 to 8 hours fully submerged in the refrigerator works well, allowing salt and sugar to penetrate evenly without overpowering the flesh.
Thicker cuts may require up to 12 to 20 hours, guaranteeing thorough moisture extraction and flavor infusion.
Avoid exceeding 48 hours to prevent overly firm or salty texture. If needed, a double brine with two shorter periods separated by a rest can enhance flavor complexity.
Always keep the salmon fully immersed to guarantee uniform curing.
After brining, pat dry; don’t rinse, as rinsing removes beneficial surface salts.
Mastering these precise timing guidelines guarantees your salmon is perfectly primed for smoking.
For optimal curing results, use kosher salt in your brine to ensure even curing and avoid off-flavors.
Which Salt and Sugar Work Best for Brining Salmon?
Choosing the right salt and sugar for brining salmon directly impacts the texture, flavor balance, and curing efficiency of your final product.
Kosher salt is preferred because its coarse grains dissolve evenly, ensuring consistent curing without over-salting.
Diamond Crystal and Morton varieties are popular; Diamond Crystal dissolves faster due to larger crystals, offering a milder cure.
For sugar, brown sugar stands out, providing a rich molasses undertone that balances saltiness and enhances browning.
White sugar adds sweetness without altering flavor complexity.
Consider these key points:
- Use kosher salt (Diamond Crystal or Morton) for precise, controlled curing.
- Opt for brown sugar to introduce depth and aid caramelization.
- Combine sugars cautiously for balanced sweetness without overpowering the fish.
Additionally, using coarse kosher salt can enhance the depth of flavor and texture during the brining process.
Adding Flavor to Your Salmon Brine
Enhance your salmon brine by carefully selecting complementary flavor components that elevate the fish’s natural taste without overwhelming it.
Start with foundational ingredients, kosher salt and brown sugar, to balance salinity and sweetness. Then, consider adding herbal notes like dill weed and thyme for subtle complexity.
Aromatics such as garlic and onion powders introduce depth, while a splash of soy sauce or dry white drink can impart umami and slight acidity. For a mild heat boost, add Tabasco sparingly.
Avoid overpowering the delicate salmon flavor by measuring additions precisely; for example, use no more than a teaspoon of strong spices per quart of brine.
Stir herbs and spices thoroughly to guarantee even distribution. This analytical approach lets you craft a brine that enhances rather than masks salmon’s inherent qualities.
Be sure to cool the wet brine to room temperature before submerging the fish to ensure proper brine penetration and food safety.
Preparing Salmon for Brining
When you’re getting ready to brine your salmon, it’s important to choose portions that are about 2 to 3 inches thick, and make sure they’ve the skin on. This helps ensure that the brining happens evenly.
Now, let’s talk about the brine itself. You’ll want to fully dissolve the salt and sugars in either warm or cold water. Just remember to cool the solution down before you add the fish!
It’s all about getting the right portion size and having a well-balanced brine that’s completely dissolved. This way, you’ll get consistent flavor absorption and a great texture.
For best results, pat the salmon dry before brining to reduce surface moisture and improve texture retention.
Selecting Salmon Portions
How do you determine the ideal salmon portions for brining? Start by considering thickness, surface area, and skin presence. These factors influence brine absorption and even curing.
- Thickness: Choose portions 2-3 inches thick for uniform salt penetration without over-brining.
- Surface Area: Select fillets with sufficient surface area to maximize brine contact, ensuring thorough flavor infusion.
- Skin-on: Retain the skin to protect the flesh during brining and smoking, preserving moisture and texture.
Cutting salmon into consistent, manageable portions helps control brining time precisely. This avoids overly salty or under-flavored results.
Thicker pieces require longer brining, while thinner cuts brine faster. By analyzing these criteria, you optimize brine effectiveness, yielding perfectly cured salmon ready for smoking. Proper brining is especially important in cold smoking to ensure safety and flavor development.
Preparing Brine Solution
Preparing an effective brine solution requires carefully balancing salt, sugar, and liquid proportions to guarantee proper curing and flavor development.
Start by dissolving kosher salt and brown sugar fully in warm or cold water, depending on your recipe, making certain no granules remain.
Precise measurements matter; for example, 1/2 cup kosher salt with 1/2 cup brown sugar per 1 1/2 cups water provides a solid baseline.
Stir thoroughly, then cool the brine before adding salmon to avoid partial cooking.
Incorporate optional seasonings like garlic powder or soy sauce with care, as they influence moisture retention and flavor depth.
Finally, fully submerge the salmon in the chilled brine, using a sealed container or bag, and refrigerate for the recommended time to guarantee uniform curing and peak taste infusion.
For best results, always keep the brined salmon refrigerated at or below 40°F to maintain safe storage temperature and prevent bacterial growth.
Best Brining Times for Different Salmon Cuts
When brining salmon, the thickness and cut markedly influence the best soaking time to guarantee proper flavor infusion and texture. Thicker cuts need longer brining to penetrate fully, while thinner pieces require less time to avoid over-salting.
Salmon cut and thickness directly determine ideal brining time for balanced flavor and texture.
Here’s a precise guide:
- Salmon Fillets (1–1.5 inches thick): Brine 4–6 hours. This duration balances salt absorption and sugar penetration, enhancing moisture retention without toughening the flesh.
- Salmon Steaks (about 2 inches thick): Brine 6–8 hours. The denser muscle needs extended time for even curing, ensuring consistent flavor and texture throughout.
- Whole Side (3+ inches thick): Brine 12–20 hours. Longer soaking is essential to permeate deep muscle layers, maximizing flavor and preservation without over-salting.
Adjust times based on your brine’s salt concentration and refrigeration. Always keep fish fully submerged for uniform curing.
Drying Salmon to Form the Pellicle
Although brining infuses flavor and firms the flesh, you need to dry the salmon thoroughly afterward to develop the pellicle, a tacky, translucent surface layer essential for smoke adhesion.
After removing the salmon from the brine, pat it dry with paper towels to eliminate excess moisture. Then, place the fillets on a wire rack set over a tray, allowing air circulation around all sides.
Leave the salmon uncovered in a cool, well-ventilated area or refrigerator for 2 to 3 hours. During this time, the surface proteins coagulate and form the pellicle, which improves smoke penetration and helps the smoke particles adhere evenly.
Avoid rinsing after drying, as this compromises pellicle formation and diminishes smoke flavor absorption.
Smoking Tips for Perfectly Brined Salmon
Once your salmon has developed a firm pellicle, you’re ready to optimize the smoking process to enhance flavor and texture.
Precision is key to unleashing the full potential of your perfectly brined salmon. Consider these critical tips:
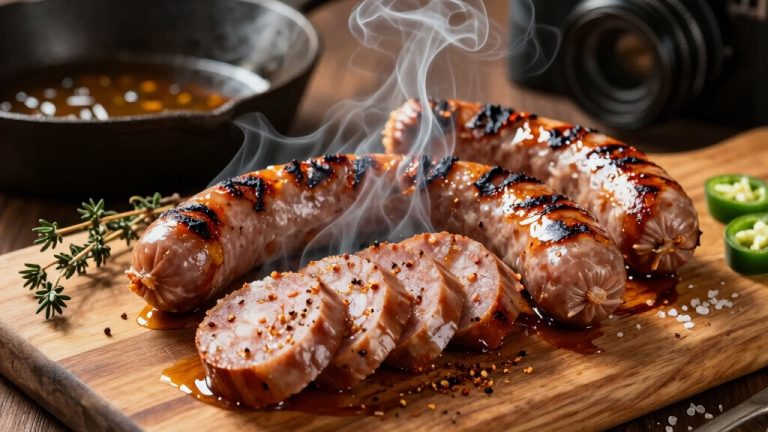
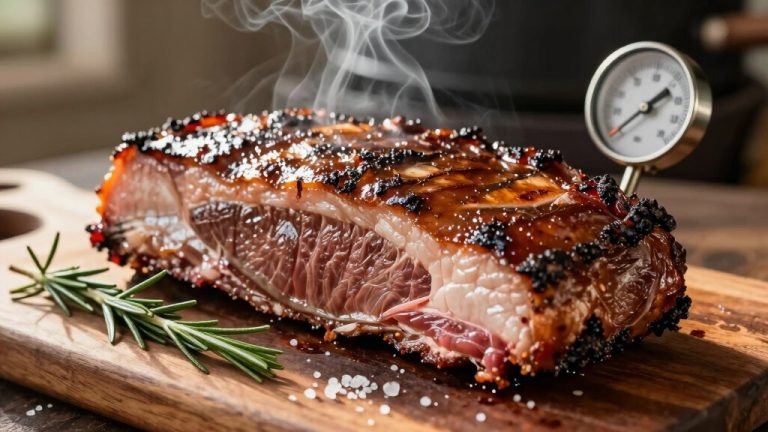
- Maintain a steady smoking temperature around 250°F. Use hardwoods like alder or hickory for smoke that complements without overpowering the brine’s balance.
- Position thicker salmon sides closer to the heat source to guarantee even cooking and consistent smoke absorption throughout the fillet.
- Incorporate a water pan in the smoker to regulate humidity. This prevents salmon from drying out and preserves moisture created by the brine.
Don’t Make These Brining Mistakes
Failing to control brine concentration and timing can severely compromise your salmon’s texture and flavor.
If your brine is too salty or too sugary, it can either toughen the flesh or leave it overly sweet, masking the natural salmon taste.
Precise salt-to-sugar ratios matter; stick to proven measurements like 1/2 cup kosher salt to 1/2 cup brown sugar per quart of water.
Overbrining dries out the fish, while underbrining results in blandness and insufficient preservation.
Timing is critical; most fillets require 4 to 8 hours, depending on thickness.
Always fully dissolve salts and sugars in water and cool the brine before adding salmon to prevent premature cooking.
Finally, don’t rinse the fish post-brine; pat it dry and allow a pellicle to form for prime smoke adhesion and flavor infusion.
Frequently Asked Questions
Can I Reuse Salmon Brine for Multiple Batches?
You shouldn’t reuse salmon brine for multiple batches because it loses salinity and sugar concentration after each use, reducing effectiveness.
Also, reused brine can harbor bacteria or off-flavors from the fish, compromising safety and taste.
If you want to reuse brine, you’d need to adjust salt and sugar levels and ensure thorough sterilization.
However, it’s generally safer and more consistent to prepare fresh brine for each batch to guarantee peak curing and flavor.
How Do I Store Leftover Brine Safely?
You’ll want to store leftover brine in an airtight container and keep it refrigerated to maintain safety and quality.
The brine’s salt content helps inhibit bacterial growth, but refrigeration is still essential.
Label the container with the date, and use it within a week to avoid spoilage.
Avoid reusing brine that’s been in contact with raw fish multiple times, as contamination risk rises despite salt’s preservative effect.
Is Brining Necessary for Frozen Salmon?
No, brining isn’t strictly necessary for frozen salmon, but it can improve flavor and texture.
Freezing may impact moisture content and firmness, so brining helps rehydrate and season the fish evenly.
If your salmon is already frozen and thawed, brining can offset dryness and add complexity.
However, if you prefer a quicker method or the salmon is pre-seasoned, you can skip brining without major quality loss.
Can I Brine Salmon Without Refrigeration?
You shouldn’t brine salmon without refrigeration because the process requires a controlled cold environment to prevent bacterial growth.
Brining involves soaking fish in a salt solution, which doesn’t instantly preserve it. Without refrigeration, the salmon can spoil quickly, risking foodborne illness.
If refrigeration isn’t available, consider alternatives like dry curing or immediate cooking. Always keep salmon cold during brining, ideally below 40°F, to guarantee safety and proper flavor development.
How Does Altitude Affect Brining Time?
Altitude throws a curveball at your brining time because lower air pressure speeds up evaporation and affects how salt penetrates the fish.
At higher elevations, you’ll want to extend the brining time slightly to make sure the salmon absorbs enough salt and flavor.
The cooler boiling point of water can also influence brine temperature, so monitor it closely.
Adjust your timing by 10-20% longer for every 3,000 feet above sea level to get the perfect cure.
Perfect Smoked Salmon Starts With a Better Brine
Brining salmon boosts moisture retention by up to 15%, ensuring tender, flavorful results every time. By mastering salt and sugar ratios, you control texture and taste precisely.
Remember, drying forms the essential pellicle for ideal smoke absorption. Brine timing varies; thicker cuts need longer soaks.
Avoid common mistakes like over-brining, which toughens flesh. With these detailed strategies, you’ll consistently elevate your smoked salmon, turning a simple process into a culinary science worth perfecting.