How to Use a Masterbuilt Gas Smoker? Step-by-Step Guide
To use your Masterbuilt gas smoker, first make certain the gas cylinder valve and burner controls are off. Then inspect hoses and burners for damage or blockages.
Connect the regulator securely to the cylinder and perform a leak test with soapy water. Season the smoker by running it at 350°F with water in the bowl and wood chips for an hour.
Light the burner safely using a match or ignitor, adjust the flame, and place food evenly inside. When finished, turn off the burner and cylinder, let it cool, and store it properly.
For detailed steps on setup, seasoning, and maintenance, keep exploring.
Key Takeaways
- Assemble smoker outdoors with all valves off, inspect hoses and burners for damage or blockages before use.
- Connect regulator to gas cylinder securely, perform leak test using soapy water, and open gas valve slowly.
- Season smoker by running at 350°F for one hour, then oil racks and run a second 20-minute burn.
- Ignite burner using a long match or ignitor button, adjust air shutter for steady blue flame and proper combustion.
- Place food evenly on racks, close lid securely, set desired flame, and after use, turn off burner and gas valve.
Prepare Your Masterbuilt Gas Smoker By Checking Components
Before you start assembling your Masterbuilt gas smoker, make sure the gas cylinder valve is in the OFF position to guarantee safety.
Ensure the gas cylinder valve is off before assembling your Masterbuilt gas smoker for safe operation.
Begin by removing the protective caps from both the gas cylinder and the coupling nut. Align the regulator nipple carefully with the valve outlet on the gas cylinder, then turn the coupling nut clockwise until it stops.
Avoid over-tightening to prevent damage. Keep the burner control valve in the OFF position throughout the setup process.
Once connected, perform a soapy water test around the regulator and cylinder connection to detect leaks; look for bubbles forming. Address any leaks before proceeding.
This careful preparation assures a safe, reliable connection and sets the foundation for peak smoker performance every time you use it.
When using the smoker outdoors, always position it under a shelter to protect the gas connections from moisture and ensure safety in damp conditions.
Inspect Hose and Burner for Safety Before Use
Start by thoroughly inspecting the hose for any signs of wear, cracks, or leaks, as these can pose serious safety hazards. Run your fingers along its entire length, checking for brittleness, cuts, or bulges.
If you detect any damage, replace the hose immediately before proceeding.
Next, examine the burner and burner venturi tube for blockages, rust, or dents that could restrict gas flow or cause uneven flames.
Clear away any debris or spider webs using a brush or compressed air. Make certain the burner ports are clean and unobstructed to maintain proper combustion.
Never operate the smoker if you suspect any component is compromised. Prioritizing these inspections protects you from potential gas leaks and ensures the smoker functions efficiently and safely every time you fire it up.
Because propane ignites at a lower temperature and requires precise burner adjustments, ensuring all components are in good condition is critical for safe operation.
Connect the Regulator and Gas Cylinder Correctly
Before you get started connecting the regulator, it’s really important to ensure that the gas cylinder valve is completely turned off. This step helps to prevent any leaks, which is definitely something you want to avoid.
Once you’ve confirmed that the valve is off, you can go ahead and align the regulator nipple with the cylinder valve outlet. It’s time to secure it by turning the coupling nut clockwise until it feels snug. Just a quick tip: don’t over-tighten it, as that can cause issues down the line.
After you’ve made the connection, always remember to do a soapy water test around the connection. This is a great way to check for any gas leaks before you light the smoker. Safety first, right?
Keep in mind that in cold weather, wind and precipitation can disrupt combustion efficiency, so always monitor your smoker’s temperature closely.
Valve Position Before Connection
When you connect the regulator to the gas cylinder, make sure the gas cylinder valve is completely turned OFF. This step is critical to prevent accidental gas leaks or ignition during connection.
Before attaching the regulator, remove the protective cap from both the gas cylinder valve and the coupling nut. Confirm the valve handle is fully closed by turning it clockwise until it stops firmly.
Never attempt to connect the regulator while the valve is open or partially open, as this can be dangerous. Keeping the valve closed guarantees no gas escapes, allowing you to safely secure the regulator.
Always double-check the valve position before proceeding to the next steps to maintain safe operation and prevent potential hazards during setup.
Using equipment with proper food safety standards ensures safe and effective smoking of meats and other foods.
Proper Regulator Attachment
Secure the regulator to the gas cylinder by carefully aligning the regulator nipple with the valve outlet.
Before connecting, make certain the gas cylinder valve is fully turned OFF and the protective caps are removed from both the cylinder and coupling nut.
Insert the regulator nipple into the valve outlet, then turn the coupling nut clockwise by hand until it stops firmly.
Avoid over-tightening, as this can damage the threads and cause leaks.
Keep the burner control valve in the OFF position during this process to prevent gas flow.
Always handle the regulator and gas cylinder with care to maintain a secure and safe connection.
Proper attachment is essential for safe operation and efficient gas flow during smoking sessions.
Ensure the regulator and cylinder are inspected regularly for damage and never submerge electrical components in water to avoid electrical hazards.
Leak Testing Procedures
After you’ve connected the regulator to the gas cylinder, you’ll want to check for leaks to guarantee safety. First, make certain the gas valve remains OFF. Then, apply a soapy water solution around the connection points, especially at the regulator nipple and coupling nut.
Slowly open the gas cylinder valve and watch for bubbles indicating leaks. If bubbles appear, close the valve immediately and tighten connections or replace faulty parts. Always perform this test outdoors or in a well-ventilated area to avoid inhaling any gas or contaminants and to ensure proper ventilation safety.
| Step | Action | Result |
|---|---|---|
| 1 | Keep gas valve OFF | Prevents gas flow |
| 2 | Apply soapy water to joints | Detects leaks visually |
| 3 | Open gas valve slowly | Allows gas flow |
| 4 | Observe for bubbles | Identifies leak points |
| 5 | Close valve if bubbles appear | Ensures safety |
Perform this test before every use to maintain safe operation.
Season Your Masterbuilt Gas Smoker Before First Use
Before you start smoking your favorite foods, you’ll need to season your Masterbuilt gas smoker to prepare its interior surfaces. This vital step removes manufacturing residues and primes the metal for future use.
Follow these steps to season your smoker effectively:
Place the water bowl inside and fill it with one inch of water to maintain moisture. Fill the wood chip tray with up to one cup of wood chips or chunks for smoke generation.
Light the smoker and run it at 350°F (177°C) for approximately one hour to burn off residues. After it cools, apply a light coat of cooking oil to the racks and inside the door, then run a second 20-minute burn to set the seasoning.
Seasoning guarantees peak flavor and prolongs your smoker’s lifespan. Be sure to use oils with a high smoke point to create a durable, protective coating on the metal surfaces.
How to Light Your Masterbuilt Gas Smoker Safely?
Now that your Masterbuilt gas smoker is properly seasoned and ready, you can safely proceed to light it.
First, make certain the smoker doors are open to prevent gas buildup.
Check the hose for any damage and confirm all burner valves are off.
Remove the protective cap from the gas cylinder, connect the regulator securely, and turn the gas cylinder valve on.
Hold a long, lit fireplace match close to the burner while slowly turning the burner control knob to “ON.”
Alternatively, push the ignitor button within five seconds.
If ignition fails, turn the burner off and wait five minutes before retrying.
Confirm the flame is steady and blue; adjust the air shutter if necessary.
Always follow these steps carefully to prevent gas leaks or flare-ups.
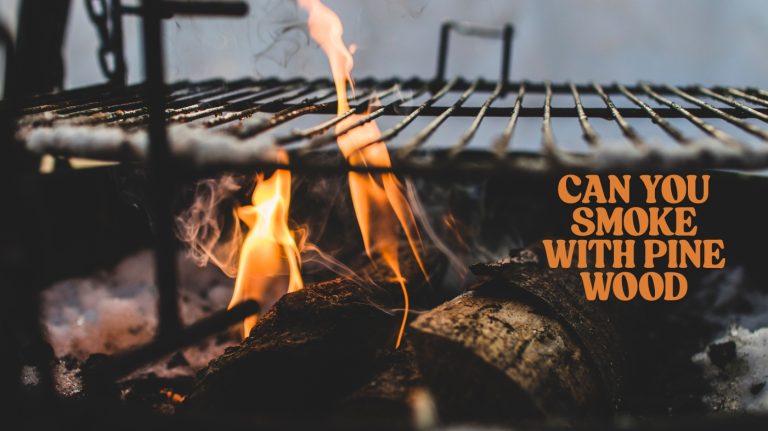
For safety, avoid using pine wood in your smoker, as its resinous smoke can produce harmful and unpleasant emissions.
Adjust the Flame for Best Smoking Results
Fine-tune the air shutter on your Masterbuilt gas smoker to achieve a steady, blue flame that guarantees efficient combustion and peak temperature control.
Adjusting the flame correctly assures consistent heat, which is essential for even smoking and flavor development.
Avoid a yellow or flickering flame, as it signals incomplete combustion and wasted fuel.
Here’s how to optimize flame adjustment:
Open or close the air shutter slowly to stabilize the flame color and size.
Monitor burner flame shape; it should be steady, not wavering or lifting.
Use the burner control knob to fine-tune temperature after air shutter adjustment.
Regularly inspect the burner and venturi tube for blockages that affect flame quality.
Proper flame adjustment leads to better fuel efficiency and superior smoked results.
For enhanced smoking, consider proper airflow management to maintain steady temperatures and efficient combustion.
Load Wood Chips and Water for Flavor and Moisture
Start by filling the wood chip tray with up to one cup of your chosen wood chips or chunks to infuse your food with rich, smoky flavors.
Use hardwood varieties like hickory, mesquite, or applewood, depending on the flavor profile you prefer. Avoid overfilling to prevent smothering the fire or causing excessive smoke.
Next, pour about one inch of water into the water bowl located beneath the wood chip tray. This water adds essential moisture, helping regulate temperature and preventing food from drying out during smoking.
Check that the water level remains sufficient throughout the session, topping off as needed without interrupting the smoker’s operation.
Properly loading wood chips and maintaining water guarantees consistent smoke production and ideal moisture for tender, flavorful results.
For a balanced and versatile smoky flavor, consider using oak wood properly seasoned and dried to enhance your meat’s taste and appearance.
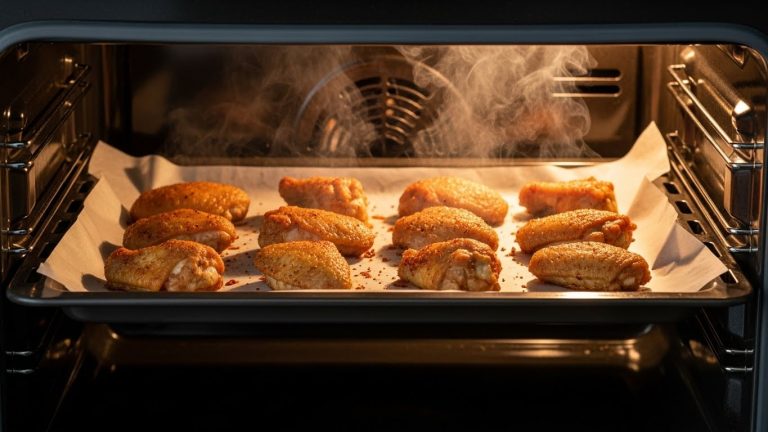
Place Food and Manage Smoking Operation
Before you get started with grilling, let’s make sure everything is in order. First things first, check that the wood chips are nicely set in the flame disk bowl. Oh, and don’t forget to fill up the water bowl! This little step is key for keeping things moist while smoking.
Now, when it comes to arranging your food, try to place it evenly. This way, you’ll get that consistent smoke and heat flowing throughout the chamber. Once you’ve got everything in position, go ahead and close the lid securely.
Lastly, adjust the burner flame to your preferred level. This will help you maintain those ideal smoking conditions. Happy grilling!
Wood And Water Preparation
When preparing your Masterbuilt Gas Smoker for use, place wood chips or chunks directly into the flame disk bowl to generate flavorful smoke.
Next, fill the water bowl with about one inch of water or marinade; this maintains a moist cooking environment and stabilizes temperature.
Proper wood and water preparation guarantees even smoke distribution and prevents food from drying out during smoking.
Use dry wood chips or chunks for consistent smoke; avoid wet or green wood to prevent unpleasant flavors.
Refill the water bowl if smoking exceeds several hours to maintain moisture.
Place the water bowl securely to avoid spills when opening smoker doors.
Combine different wood types cautiously to complement your food’s flavor profile.
This preparation is essential to achieving peak smoking results with your Masterbuilt Gas Smoker.
Food Placement And Lid
Place your food carefully on the grill racks after you’ve prepared the wood and water bowls.
Arrange items evenly, leaving space between pieces to guarantee proper smoke circulation and consistent cooking.
Avoid overcrowding to prevent uneven heat distribution.
Once the food is set, close the smoker lid securely to maintain temperature and trap the smoke inside.
Immediately after igniting the burner, adjust the flame to your desired level for peak cooking.
Remember, the lid becomes hot during operation, so always wear protective gloves when opening or handling it.
Keep the smoker stationary throughout the process; moving it can disrupt heat and smoke flow, affecting results.
Proper food placement and lid management are essential for achieving tender, flavorful smoked dishes every time.
Shut Down Your Masterbuilt Gas Smoker Safely
Although it might be tempting to rush once your smoking session ends, you need to follow a specific shutdown sequence to guarantee safety and maintain your Masterbuilt Gas Smoker’s longevity.
Start by turning the burner control knob to OFF to stop the flame immediately. Next, close the gas cylinder valve to cut off the fuel supply.
Wait patiently for the unit to cool completely before handling it to avoid burns or damage. Finally, disconnect the regulator from the gas cylinder to confirm no leaks or accidental gas flow.
To shut down safely, remember to:
- Turn off the burner control knob before the gas valve
- Close the gas cylinder valve after burner shutdown
- Allow the smoker to cool fully before touching or moving
- Disconnect the regulator only after cooling completes
Store Your Masterbuilt Gas Smoker Properly After Use
Since proper storage safeguards your Masterbuilt Gas Smoker’s performance and safety, you must follow specific steps after each use.
First, guarantee the unit has completely cooled down before handling.
Disconnect the regulator from the gas cylinder and remove the cylinder entirely if you plan to store the smoker indoors.
Store the gas cylinder in a well-ventilated, outdoor area away from direct sunlight and heat sources.
Wipe down the smoker’s interior and exterior surfaces to remove grease and residue, preventing corrosion.
Keep the smoker covered with a breathable, weather-resistant cover to protect it from dust and moisture.
Finally, store your Masterbuilt Gas Smoker in a dry, sheltered location to avoid damage and maintain peak functionality for your next smoking session.
Frequently Asked Questions
Can I Use Different Types of Wood Chips for Various Flavors?
Yes, you can definitely use different types of wood chips to create various flavors in your smoker.
Each wood type imparts a unique taste, like hickory for a strong, smoky flavor, apple for a sweet, mild touch, or mesquite for an intense, bold profile.
Just fill the wood chip tray with up to one cup of your chosen chips before lighting.
Experiment to find your favorite flavor combinations for different foods.
How Do I Clean the Smoker After Each Use?
You’ll want to clean your smoker right after it cools completely to avoid burns and preserve components.
Coincidentally, this downtime lets you inspect for residue or grease buildup.
Remove racks and wood chip trays, scrubbing with warm, soapy water.
Wipe down interiors and drip pans carefully.
Regular cleaning prevents flavor contamination and guarantees efficient operation.
Don’t forget to check hoses and vents during this process, maintaining safety and performance.
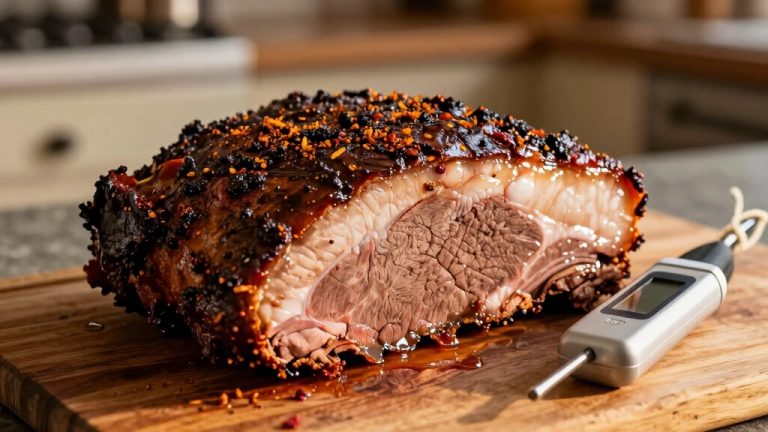
What Is the Ideal Temperature Range for Smoking Different Meats?
You want to keep your smoker between 225°F and 275°F for most meats.
Low and slow is key. 225°F works great for brisket, pork shoulder, and ribs, ensuring tenderness and flavor.
For poultry and fish, aim closer to 250°F to 275°F for even cooking without drying out.
Always monitor the temperature closely, adjusting the burner and air shutter to maintain a steady, consistent heat throughout your smoking session.
Can I Use the Smoker Indoors With Proper Ventilation?
Though you might feel like a pioneer with your trusty gas smoker, you shouldn’t use it indoors—even with ventilation.
Gas smokers produce combustion gases and potential carbon monoxide, which ventilation can’t fully clear.
Always operate the smoker outside in an open, well-ventilated area to guarantee safety.
After use, disconnect the gas cylinder and only store the smoker indoors once completely cooled and uncoupled.
Safety must come first every time.
How Long Does It Take to Fully Season the Smoker Initially?
It takes about two hours to fully season your smoker initially.
First, pour one inch of water into the water bowl and fill the wood chip tray with up to one cup of wood chips.
Run the smoker for one hour at 350°F (177°C).
After it cools, apply a light coat of cooking oil on racks and inside the door.
Then run a second 20-minute burn to complete seasoning.
Ensure Safe and Efficient Smoker Use Every Time
Now that you know how to use your Masterbuilt gas smoker safely and effectively, remember that slow and steady wins the race.
Taking the time to prepare, monitor, and maintain your smoker guarantees delicious, perfectly smoked meals every time.
Follow each step carefully, from inspecting components to storing your unit, and you’ll enjoy consistent results while protecting your equipment.
With patience and attention to detail, your smoking experience will be both rewarding and hassle-free.