How to Make Wood Chips for Smoking: Homemade BBQ Secrets
To make wood chips for smoking, start by choosing mild woods like apple or cherry for subtle flavors, or hickory for stronger smoke.
Cut straight, knot-free branches about 0.5–1 inch thick, then split them into 1–2 inch chunks.
Season the wood for at least three years or dry chips to 5%–8% moisture for clean smoke.
Soak chips briefly before use, and add them gradually to your heat source to control smoke intensity.
Keep going to master preparation and storage tips.
Key Takeaways
- Select straight, knot-free branches about 0.5–1 inch thick for easy splitting and even burning.
- Cut branches into 1–2 inch segments and split into uniform chips approximately 0.5–1 inch thick for consistent smoke.
- Use a sharp hatchet or axe, chopping straight down on a stable surface to create clean, manageable chips.
- Season wood chips for about 3 years or dry them to 5%–8% moisture for mild, clean smoke without harshness.
- Sun-dry split chips in a single layer with good airflow, turning periodically, then store in airtight containers away from moisture.
Choose the Right Wood Species for Smoking Chips

Start by selecting wood species that match the flavor profile you want to achieve in your smoking.
Begin by choosing wood types that complement the flavor you aim to create in your smoking.
If you want a mild, sweet smoke, apple and cherry woods are excellent choices, offering a subtle fruity aroma that complements poultry and meat.
For a stronger, more robust flavor, hickory provides a classic, hearty smoke perfect for beef or ribs.
Avoid heavy smoke woods in excess, as they can overpower your food’s natural taste.
Peach wood, well-seasoned for at least three years, also works well for balanced, fruity notes.
You’ll want to focus on wood that’s readily available in small branches, making it easier to cut and chip.
Maple wood is another excellent option, providing a mild, sweet smoke that enhances flavor without overwhelming delicate foods.
Prepare Branches for Optimal Chip Size
When you’re getting ready to make some chips, it’s a good idea to start by picking branches that are about half to one inch thick. This thickness helps ensure that your chips will burn evenly, which is key for a good fire.
Next, grab a hand saw or some pruning shears to cut those branches into manageable pieces. Don’t worry; it doesn’t have to be perfect! Just make sure the chunks are easy to handle.
Once you have those pieces, you can split them using a sharp hatchet or axe. When you’re chopping, aim to bring the hatchet straight down and hold it firmly near the end for better control. This way, you’ll make those cuts efficiently and safely.
Happy chopping!
Selecting Appropriate Branch Thickness
Choose branches with a thickness between 0.5 inches and 1 inch to make sure your wood chips break down easily and burn evenly.
Branches thinner than half an inch tend to burn too quickly, producing less smoke and more ash. Thicker branches, over an inch, can be tough to split into chip-sized pieces and may smolder unevenly.
When selecting, look for straight sections free of knots; these split cleaner and provide consistent chip sizes. Dead branches often work well since they’re brittle and easier to handle.
Avoid overly green or fresh wood, as moisture content affects chip quality. Sticking to this thickness range guarantees your chips are manageable, fit well on your smoker, and deliver steady, controlled smoke throughout your cook.
For best results, ensure your wood chips are properly seasoned to reduce moisture content, aiming for 15–20% moisture before use.
Cutting Techniques For Chunks
Cut branches into manageable chunks before splitting them into chips to guarantee consistent sizing and easier handling. Use a sharp saw to cut 1 to 2-inch segments, holding the branch steady to avoid slips.
Cut straight down to prevent wood pieces from flying off, and avoid cutting too close to edges to maintain chunk integrity. Keep your hatchet sharp and grip it near the handle’s end for better control and chopping force.
Focus on wood thickness around 0.5 to 1 inch for prime chip formation, especially when working with hardwoods like maple or cherry.
Properly seasoned wood with reduced moisture content will chip more cleanly and burn more efficiently when used for smoking.
| Tool | Cut Size | Technique |
|---|---|---|
| Hand Saw | 1-2 inches | Straight down cut |
| Pruning Shears | Small branches | Controlled snip |
| Hatchet | Splitting prep | Firm grip & sharp edge |
| Axe | Chunk sizing | Avoid edges, steady hits |
| Hands | Dead wood | Break brittle sections |
Splitting Wood Into Chips
Handle your prepared chunks carefully as you split them into chips, aiming for uniform pieces around 0.5 to 1 inch thick. Use a sharp hatchet or axe, holding the handle near the end for control and power.
Position the chunk on a stable surface, then chop straight down to avoid wood flying off. Avoid cutting too close to edges to keep pieces intact. If you’re working with dead branches, you might break them by hand for quicker results.
Keep your hatchet sharp; sharpen it monthly to maintain effective chopping. Uniform chip size guarantees even smoking and consistent flavor release.
Preparing chips correctly at this stage sets the foundation for excellent smoking results, so take your time to work precisely and safely. Selecting the right wood type for your chips is essential to enhance the delicate flavors of fish without overpowering them.
Split Wood Into Ideal Smoking Chips
Start by breaking down your branches into manageable chunks about 1 to 2 inches long. This makes the splitting process more controlled and safer.
Use a sharp hatchet or axe, holding the handle near the end for better force and control. Place the wood securely on a sturdy surface, then chop straight down to avoid pieces flying off.
Aim for wood thickness between 0.5 and 1 inch to create ideal chips that burn evenly and produce consistent smoke. Avoid cutting too close to edges, ensuring each piece maintains structural integrity during splitting.
If you’re working with dead branches, you might find they break easily by hand, saving some effort. This method guarantees your chips are uniform and ready for seasoning, maximizing their smoking potential.
For the best flavor and safety, use food-grade hardwood pellets or chips compatible with your desired smoke profile when smoking.
Season and Dry Wood Chips Properly
To make sure your wood burns evenly and produces clean smoke, aim for wood that’s been seasoned for about three years. That way, you’ll get the best results.
After you cut your chips, don’t forget to leave them out in the sun for at least a day. This helps to drive out any excess moisture. You really want to target wood with a moisture content of around 5% to 8%. If it’s any wetter than that, you might run into uneven smoking and annoying flare-ups. So, take your time with the seasoning process; it’ll make all the difference! Proper hardwood selection, such as oak or hickory, can enhance smoke flavor and complement your cold smoking process.
Wood Aging Time
Aging wood properly is essential for producing consistent, flavorful smoke when smoking food. You want to season your wood for at least three years, allowing moisture to evaporate and the wood to cure.
Well-aged wood burns evenly, delivering a clean smoke without overpowering bitterness. Avoid green wood with high moisture; it creates thick, unpleasant smoke and uneven heat. Using properly seasoned oak ensures a steady release of smoke and heat, ideal for long smoking sessions.
Use the table below to track your wood aging progress:
| Age of Wood | Moisture Content | Suitability for Smoking |
|---|---|---|
| Fresh (<1 yr) | 40% – 60% | Too wet, avoid use |
| 1-2 years | 20% – 30% | Improving, not ideal |
| 3+ years | 10% – 20% | Prime for smoking |
| Kiln-dried | 5% – 8% | Best for consistent results |
Sun Drying Process
Once your wood has reached the ideal seasoning age, exposing it to direct sunlight for about a day helps drive out any remaining moisture.
Lay your split chips in a single layer on a clean, dry surface like a wooden pallet or tarp, ensuring good airflow around each piece.
Turn the chips periodically to promote even drying and prevent mold growth.
Choose a sunny day with low humidity to maximize moisture evaporation.
Avoid stacking chips too thickly, as trapped moisture can cause uneven drying and spoil your smoke quality.
Keep an eye on the weather; bring the chips indoors if rain threatens.
This simple sun drying step further reduces moisture, making your wood chips ready for soaking and smoking.
It ensures consistent, flavorful smoke without harsh flare-ups.
Proper seasoning reduces moisture below 20%, which is crucial to prevent sour smoke and maintain clean, mild smoke quality.
Ideal Moisture Content
Consistently maintaining the ideal moisture content in your wood chips is essential for producing clean, flavorful smoke.
Aim for wood chips dried to roughly 5%–8% moisture, similar to kiln-dried wood.
Freshly cut or green wood contains too much moisture, causing excess smoke and uneven burning, which can ruin the flavor.
To achieve this, season your wood chips by aging branches for about three years.
Then, sun-dry freshly cut pieces for at least a day to drive out extra moisture.
Before smoking, make sure your chips are fully dry yet not brittle, so they smolder gently without flaring.
Properly dried chips will create a steady blue smoke that enhances your food’s taste without overpowering it or producing harsh, acrid smoke.
Using wood chips with the appropriate moisture level is crucial for maximizing the efficiency of cold smoke generators and ensuring a consistent smoke output.
Soak Wood Chips Before Use
Soaking wood chips before use prevents them from catching fire too quickly and burning up without producing smoke. You want to soak your chips for at least 30 minutes to make certain they smolder rather than flare.
This soaking time allows moisture to penetrate the wood, slowing ignition and encouraging steady smoke production. If you prefer a longer soak, several hours or overnight is fine, especially for charcoal grilling later in the day.
Just avoid soaking chips too long, which can make them soggy and harder to ignite evenly. Use a container large enough to submerge all chips completely and drain excess water before placing them on your heat source.
Proper soaking balances moisture and dryness, helping you create rich, aromatic smoke that enhances the flavor of your food. Because humidity effects on chips can reduce combustion efficiency and cause clumping, managing moisture is crucial for optimal performance.
How to Add Wood Chips to Your Heat Source?
When you’re ready to add your soaked wood chips to the heat source, start by draining them well to prevent excess water from causing flare-ups or steam bursts.
Proper placement guarantees steady smoke and flavor infusion. Follow these steps:
Proper placement ensures consistent smoke and enhances flavor infusion for the best grilling results.
- Spread the drained chips evenly over hot charcoal, avoiding pile-ups that can smother airflow.
- For gas grills, place chips inside a smoker box or wrap them in foil packets with holes poked for smoke release.
- Position the smoker box or foil near a high burner to generate consistent heat without direct flame contact.
- Add chips gradually; start with a small amount to monitor smoke production and prevent overpowering your food.
This careful approach maximizes smoke control and flavor without compromising safety or grill performance.
Tips to Control Smoke Intensity With Wood Chips
After you’ve added your wood chips to the heat source, managing the smoke intensity becomes your next focus to achieve the perfect flavor balance.
Start by soaking your chips for 30 minutes to prevent them from flaring up and producing harsh smoke. Use only one handful at a time, then add more gradually to avoid overpowering flavors.
Watch the smoke color closely: aim for a light blue, translucent smoke rather than thick or dark clouds, which can turn bitter. If smoke gets heavy, reduce the chip quantity or move them slightly off direct heat.
Wrapping chips in foil with holes slows burning, extending smoke time and softening intensity. Adjust your wood species choice too; milder woods like apple or cherry create subtler smoke, while hickory or peach can boost strength. Balance accordingly.
Store Wood Chips to Maintain Quality
Preserve the flavor and smoking quality of your wood chips by storing them properly in a cool, dry place away from direct sunlight and moisture. Improper storage can lead to mold growth or moisture absorption, compromising the chips’ burning efficiency and flavor.
Follow these essential steps to maintain quality:
- Use airtight containers or heavy-duty resealable bags to keep chips dry and protected from humidity.
- Label containers with the wood type and date prepared to track freshness and seasoning time.
- Store wood chips off the ground on shelves or pallets to avoid dampness and pests.
- Avoid temperature fluctuations by keeping chips in a stable environment to prevent condensation inside storage.
Frequently Asked Questions
How Often Should I Sharpen My Hatchet for Chopping Wood?
You should sharpen your hatchet about once a month if you’re chopping wood regularly.
Keeping the blade sharp makes splitting easier and safer, helping you maintain control and apply the right force.
Dull edges can cause the hatchet to bounce or slip, increasing effort and risk.
If you notice it’s not cutting cleanly or requires extra force, it’s definitely time to sharpen.
Regular maintenance saves you time and frustration.
Can Dead Branches Be Used Without Tools for Chip Preparation?
Yes, you can use dead branches without tools for chip preparation.
Dead branches are brittle and often break easily by hand, saving you time and effort. Just look for branches about 0.5 to 1 inch thick to guarantee they split into manageable chip-sized pieces.
However, for more precise or larger chunks, using a sharp hatchet or axe will give you better control and consistent chip sizes.
What Is the Ideal Wood Thickness for Splitting Into Chips?
You might think smashing giant logs would make better chips, but actually, aim for wood about 0.5 to 1 inch thick. This size splits easily without turning into sawdust or stubborn chunks.
Too thin, and you’ll get dust; too thick, and it won’t burn right. Holding your hatchet firmly near the end, cut straight down, avoiding edges.
This balance guarantees efficient, manageable chips that smoke evenly and flavor your food perfectly.
How Long Should Freshly Cut Wood Be Sun-Dried Before Chipping?
You should sun-dry freshly cut wood for about one full day before chipping it.
This process helps drive out extra moisture, making the wood easier to split and ensuring better chip quality.
If you skip this step, your chips could be too wet, causing uneven burning and excessive smoke when used.
Make sure the wood feels dry to the touch before you start chopping for ideal results.
When Is the Best Time to Soak Wood Chips Before Grilling?
You want to soak your wood chips about 30 minutes before grilling to prevent them from igniting too quickly.
For evening cookouts, soak them around midday so they’re ready when the fire’s hot.
This timing guarantees they smolder slowly, creating aromatic smoke instead of flaring up.
If you prefer, soaking a few hours or overnight works too.
Just avoid soaking right at the last minute to give chips time to absorb moisture evenly.
Create Better Smoke Flavor With Homemade Wood Chips
Now that you know how to make and prepare wood chips for smoking, you’re ready to elevate your grilling game.
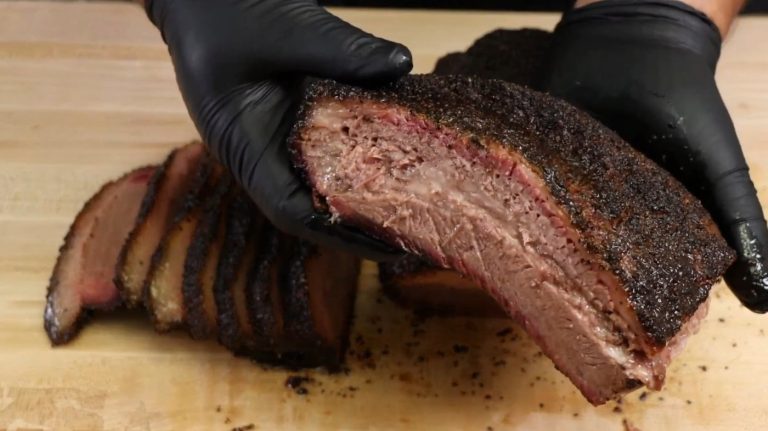
Imagine adding hickory chips to your brisket, soaking them just right, and controlling the smoke for that perfect rich flavor.
With proper drying, soaking, and storage, your chips will consistently deliver smoky goodness.
Keep experimenting with wood types and chip sizes. You’ll master the art of smoking in no time.