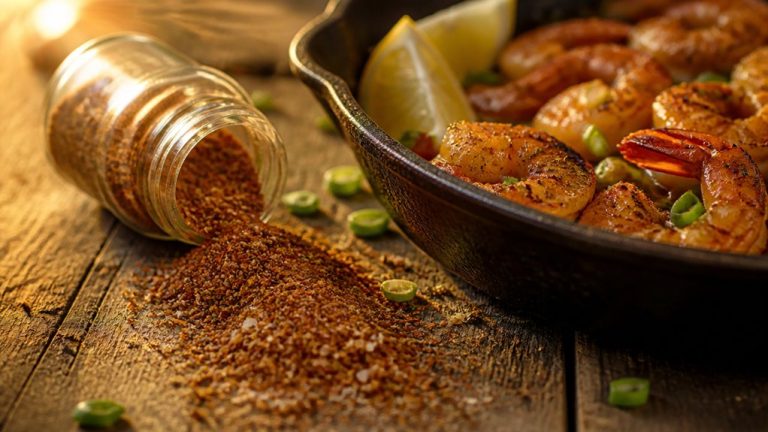
Oil Less Fryer Turkey Recipe: Crispy & Juicy Every Time
To cook a turkey in an oil-less fryer, first pat the bird dry and dry-brine with kosher salt, inserting butter under the skin for flavor and crispness.
Lightly oil the fryer basket with a high smoke point oil to prevent sticking.
Cook uncovered at medium-high heat about 9–10 minutes per pound, monitoring internal temperature to reach 165°F in the breast.
Cover with a wire mesh lid toward the end for even browning. Let the turkey rest before carving and savoring. Learn the full process for perfect results.
Key Takeaways
- Use a dry brine and dry seasoning to prevent sogginess and promote crispy skin without added oil.
- Rub the fryer basket lightly with high smoke point oil to prevent sticking, avoiding excess oil to reduce smoke.
- Cook the turkey uncovered at medium-high heat for 9–10 minutes per pound to ensure even cooking and crisp skin.
- Cover the turkey with a wire mesh lid in the last 15 minutes to enhance browning without trapping steam.
- Rest the turkey 15–20 minutes after cooking, loosely tented with foil to retain warmth and preserve crispness.
Complete Oil Less Fryer Turkey Recipe Table
| Recipe Detail | Information |
|---|---|
| Main Term | Oil Less Fryer Turkey Recipe |
| Recipe Type | Main Course |
| Cuisine | American |
| Difficulty Level | Moderate |
| Prep Time | 30 Minutes (Plus Dry Brining if Desired) |
| Cook Time | 9–10 Minutes Per Pound |
| Rest Time | 15–20 Minutes |
| Cooking Method | Oil-Less Fryer |
| Main Ingredient | Whole Turkey |
| Preparation | Pat Dry, Remove Giblets, Dry Brine, Insert Butter Under Skin |
| Binder (Optional) | Mustard |
| Seasonings | Kosher Salt, Cajun Seasoning or BBQ Rub, Garlic, Butter |
| Basket Preparation | Lightly Coat with High Smoke Point Oil |
| Cooking Temperature | Medium-High Heat |
| Target Internal Temperature | 165–170°F |
| Browning Tip | Cover with Wire Mesh Lid During Final 15 Minutes |
| Skin Texture Goal | Crispy, Golden Brown |
| Gravy Option | Make Gravy Using Turkey Drippings |
| Best Side Dishes | Mashed Potatoes, Stuffing, Green Beans, Cranberry Sauce |
| Storage | Airtight Container |
| Refrigerator Shelf Life | 3–4 Days |
| Reheating Method | Oven Until Internal Temperature Reaches 165°F |
Preparing Turkey for Oil Less Fryer Cooking

Start by thoroughly preparing your turkey to guarantee peak results in the oil-less fryer.
First, remove giblets, neck bones, and any plastic holders or pop-up thermometers from the cavity.
Begin by removing giblets, neck bones, and any plastic holders or pop-up thermometers from the turkey cavity.
Pat the turkey dry inside and out with paper towels to eliminate surface moisture, which guarantees even cooking and crisp skin.
If you used a wet brine, rinse and dry the bird completely; dry brining requires no rinsing.
Next, gently lift the skin under the wings and in crevices to insert thin butter slices and garlic cloves for added flavor.
Discard the neck and giblets before moving forward.
Finally, bring the turkey to room temperature for about an hour before cooking to promote even heat distribution throughout the bird.
Allowing the turkey to reach room temperature before cooking helps ensure even heating and prevents dryness during the cooking process.
How to Oil Your Fryer Basket for Easy Cooking?
Before placing your turkey in the oil-less fryer, thoroughly rub the cooking basket with a thin layer of cooking oil. This creates a non-stick surface that prevents the bird from adhering during cooking.
Follow these steps for best results:
- Use a high smoke point oil like canola or avocado oil for durability.
- Apply oil evenly with a silicone brush or paper towel, covering all basket surfaces.
- Avoid excess oil buildup to prevent dripping and smoke during cooking.
- Reapply a light coat if you’re cooking multiple batches to maintain non-stick properties.
This simple preparation guarantees your turkey cooks evenly and lifts out cleanly. It makes cleanup easier and preserves the basket’s condition for future use. Using oils with a high smoke point ensures effective seasoning without harmful breakdown or excessive smoke.
Seasoning and Marinating Your Turkey
With your fryer basket properly oiled, you’re ready to bring bold flavors to your turkey through seasoning and marinating.
Start by applying a binder like mustard all over, including under the wings, to help seasonings stick better.
Begin with a binder like mustard, covering all surfaces and under the wings for better seasoning adherence.
Generously sprinkle kosher salt on the skin and under it where possible for dry brining.
For injection marinade, whisk hot water, salt, maple syrup, and liquid smoke until salt dissolves, then inject evenly.
Next, layer Cajun seasoning or Franklin’s spice rub over the bird, letting it sit 15–20 minutes to absorb.
Don’t forget to lift the skin gently to insert butter slices and garlic between skin and breast meat for deeper flavor.
This precise seasoning process makes certain a juicy, flavorful turkey ready for your oil less fryer.
Be sure to inject the turkey up to 24 hours before cooking and refrigerate promptly to allow proper flavor absorption and ensure food safety.
Cooking Times and Temperature Tips for Oil Less Fryer Turkey
Cooking your turkey in an oil-less fryer is a game changer!
You’ll want to cook it for about 9 to 10 minutes per pound at medium-high heat.
Keep an eye on that internal temperature; you’re aiming for 165°F to 170°F to ensure it’s safe to eat.
Now, a little tip: use a meat thermometer and insert it into the breast, making sure to avoid any bones.
This way, you’ll get an accurate reading on doneness.
For that perfect crispy, golden finish, consider covering your turkey with a wire mesh lid during the last 15 minutes of cooking.
It helps reflect the heat back onto the turkey.
And don’t forget to spray it occasionally with a bit of oil for that extra crunch!
To ensure the juiciest results, let your turkey rest about 2 hours at room temperature before reheating for even heat distribution and moisture retention, a key step in reheating fried turkey techniques.
Enjoy your delicious turkey!
Cooking Time Per Pound
Although cooking times can vary slightly depending on your specific oil-less fryer model, a reliable rule of thumb is to cook the turkey uncovered at medium-high heat for approximately 9 to 10 minutes per pound.
This timing guarantees even cooking and a crispy exterior without drying out the meat.
To manage cooking time effectively:
- Calculate total cooking time by multiplying the turkey’s weight by 9-10 minutes per pound.
- Plan to cover the turkey with a wire mesh lid during the last 15 minutes for enhanced browning.
- Spray the skin periodically with oil to maintain crispness throughout cooking.
- Add fresh herbs about 20 minutes before the end for peak flavor infusion.
Smoking at 300°F offers a balanced trade-off between efficiency and texture, which can be considered when adapting cooking methods for optimal results.
Following these steps will help you cook a perfectly timed, delicious turkey.
Target Internal Temperatures
Achieving the correct internal temperature is essential for both the safety and juiciness of your oil-less fryer turkey.
Use an instant-read meat thermometer to monitor the temperature during the last 20 minutes of cooking.
Insert the probe into the thickest part of the breast, avoiding bone contact to get an accurate reading.
Aim for a final internal temperature between 165°F and 170°F to guarantee the turkey is fully cooked and safe to eat.
For optimal moisture, check that the breast reaches at least 150°F to 155°F before it finishes cooking.
Once the target temperature is reached, immediately remove the turkey from the fryer to prevent overcooking.
Then let it rest to allow juices to redistribute evenly throughout the meat.
Resting the turkey at room temperature for 30–45 minutes before cooking helps ensure even heating and prevents cold spots for consistent cooking.
Final Browning Techniques
Frequently, the final stage of cooking your turkey in an oil-less fryer involves careful attention to browning techniques to guarantee a crispy, golden skin. To master this, follow these precise steps:
- In the last 15 minutes, cover the bird with a wire mesh lid to reflect heat and promote even browning.
- Spray the turkey occasionally with oil during cooking to enhance crispness without adding excess fat.
- Monitor cooking time closely. Plan for about 9–10 minutes per pound at medium-high heat to balance doneness and skin texture.
- Add fresh herbs 20 minutes before the end to infuse flavor while allowing the skin to brown properly.
- Ensure the internal temperature reaches safe levels by checking the internal temperature with a reliable meat thermometer before serving.
How to Achieve Crispy Skin While Cooking
When you want perfectly crispy skin on your oil-less fried turkey, start by brushing the entire surface with cooking oil before placing it in the basket. This initial layer promotes even browning and prevents sticking.
Throughout cooking, spray the turkey occasionally with additional oil to maintain moisture while encouraging a crisp texture. Cook uncovered at medium-high heat to allow hot air circulation, which dries the skin and enhances crispiness.
During the last 15 minutes, cover the turkey with a wire mesh lid to reflect heat back, intensifying browning without trapping steam. Lifting the skin and inserting butter beforehand also helps render fat slowly, crisping the skin from beneath.
Avoid wet marinades and use dry seasoning instead to prevent sogginess and promote a crispy texture through proper moisture evaporation and fat rendering dry brining techniques.
Follow these steps closely, and your turkey’s skin will be golden, crackling, and irresistibly crisp.
Checking Turkey’s Internal Temperature Safely
Insert a reliable meat thermometer into the thickest part of the turkey breast, making sure the tip doesn’t touch any bone to get an accurate reading.
Insert the thermometer into the thickest part of the breast, avoiding bone for an accurate temperature reading.
During the last 20 minutes of cooking, check the temperature regularly. Aim for the breast to reach between 150°F–155°F to retain moisture, but confirm the final internal temperature hits at least 165°F for safe consumption.
Use an instant-read thermometer for quick checks.
Follow these steps:
- Insert the thermometer horizontally into the thickest breast meat.
- Avoid touching bone to prevent false high readings.
- Check temperature multiple times at different spots.
- Confirm the thermometer reads 165°F before removing the turkey.
This careful monitoring guarantees your turkey is both safe and perfectly cooked. For best results, remember to avoid undercooking by maintaining consistent oven temperature and verifying the internal temperature regularly.
Resting Your Turkey After Cooking
Allowing your turkey to rest for 15 to 20 minutes immediately after cooking helps the juices redistribute evenly throughout the meat. This ensures every slice stays moist and flavorful.
Once you remove the basket from the oil-less fryer, transfer the turkey to a cutting board or platter, keeping it breast side up. Resist the urge to carve it right away; cutting too soon causes valuable juices to escape and dries out the meat.
During resting, loosely tent the turkey with foil to retain warmth without trapping steam. This helps prevent the skin from softening.
After the resting period, use a sharp carving knife to slice the turkey. Start with the breast and then the legs, ensuring each piece is juicy and tender. This step is essential for prime texture and flavor.
Maintaining an internal temperature above 140°F during resting helps keep the meat safe and juicy.
Making Gravy From Turkey Drippings
First things first, let’s talk about those turkey drippings. Carefully scoop them out from the basket—don’t let any of those delicious juices slip away! They’re packed with flavor and will really elevate your gravy.
Now, while that’s happening, grab the neck and gizzards. You’ll want to brown them in a pan along with some onions and garlic. This step is key because it builds a rich, savory base for your gravy. Trust me, the aroma alone will have everyone in the kitchen!
Once those are nicely browned, it’s time to thicken things up. You can use either a roux or cornstarch—whatever you prefer. Just make sure to season it just right to really complement the flavors of your turkey.
And there you go! You’ll have a delicious gravy ready to serve.
Collecting Turkey Drippings
After the turkey finishes cooking and rests, carefully remove it from the basket to access the flavorful drippings left behind.
These drippings are the foundation for a rich, savory gravy you won’t want to miss. To collect them properly:
- Tilt the basket slightly over a heatproof container to pour out the drippings without losing any liquid.
- Use a spoon or baster to scrape any browned bits stuck to the basket walls, adding extra flavor.
- Let the drippings sit for a minute to allow fat to rise to the top.
- Skim off excess fat with a spoon, reserving the flavorful juices underneath for your gravy base.
Collecting drippings carefully makes certain you capture maximum flavor for your sauce.
Browning Neck And Gizzards
The neck and gizzards hold concentrated flavor that transforms your turkey drippings into a rich gravy base. Start by finely chopping the neck and gizzards, then sauté them in the turkey drippings over medium heat.
Add diced onions and garlic for depth. Brown evenly until caramelized, stirring frequently to prevent burning. This step enhances complexity and prepares the base for your gravy.
| Step | Ingredient | Action |
|---|---|---|
| 1 | Neck & gizzards | Chop finely |
| 2 | Turkey drippings | Sauté on medium heat |
| 3 | Onion & garlic | Add, brown evenly |
Once browned, remove solids and reserve drippings for the next step. This process maximizes flavor extraction without overcooking.
Thickening And Seasoning Gravy
Using the rich turkey drippings you’ve just prepared, you’ll want to carefully thicken and season your gravy to achieve the perfect consistency and flavor balance.
Start by removing excess fat from the drippings with a spoon. Next, whisk in a roux made from equal parts butter and flour, cooking until golden to avoid raw flour taste.
Slowly add warm stock or broth while stirring constantly to prevent lumps.
Finally, season with salt, pepper, and a splash of pan juices for depth.
- Skim fat from drippings for a cleaner base.
- Create a golden roux to thicken without grit.
- Gradually blend in warm broth, stirring continuously.
- Adjust seasoning for balanced flavor, tasting as you go.
Frequently Asked Questions
Can I Cook a Stuffed Turkey in an Oil-Less Fryer?
You can cook a stuffed turkey in an oil-less fryer, but you need to be cautious.
Make certain the stuffing reaches an internal temperature of 165°F to avoid foodborne illness.
Use a meat thermometer to check both the turkey and the stuffing.
Cooking times will be longer, so monitor carefully.
Also, avoid overpacking the cavity to ensure even heat circulation and thorough cooking throughout the bird and stuffing.
How Do I Clean My Oil-Less Fryer After Cooking Turkey?
Cleaning your oil-less fryer after cooking turkey is like giving a fresh canvas for your next masterpiece.
First, unplug and let it cool completely.
Remove the basket and drip tray, soaking them in warm, soapy water.
Use a soft brush or sponge to scrub away grease and residue carefully.
Wipe the interior and exterior with a damp cloth.
Dry all parts thoroughly before reassembling to keep your fryer in prime condition.
What Size Oil-Less Fryer Is Best for a Whole Turkey?
You’ll want an oil-less fryer with at least a 12-quart capacity for a whole turkey up to 14 pounds. This size comfortably fits the bird without crowding, allowing even heat circulation for thorough cooking.
If your turkey is larger, opt for a 16-quart or bigger fryer. Make sure the basket is spacious enough to hold the turkey breast side up, with room to insert a meat thermometer and spray oil during cooking.
Can I Use Frozen Turkey Directly in the Oil-Less Fryer?
You shouldn’t cook a frozen turkey directly in the oil-less fryer. It’s important to fully thaw the bird first to guarantee even cooking and avoid food safety risks.
Thaw your turkey in the refrigerator for several days, depending on its size, until completely defrosted. This helps the heat penetrate evenly, preventing undercooked spots.
Always pat the turkey dry and prepare it properly before placing it in the fryer basket.
Are There Any Safety Tips for Handling Hot Baskets in an Oil-Less Fryer?
Did you know burns from hot fryer baskets cause over 20,000 emergency room visits annually?
To stay safe, always wear heat-resistant gloves when handling the basket. Use sturdy tongs or a spatula to avoid slipping.
Set the hot basket on a heatproof surface away from edges. Keep kids and pets clear from the cooking area.
Never rush; let the basket cool slightly before cleaning to prevent injury.
Cook a Flavorful Oil-Less Fried Turkey With Confidence
You’ve prepped your turkey, oiled the basket, and seasoned every inch. You’ve set the perfect temperature, monitored the internal heat, and achieved that crispy skin you crave.
You’ve rested your bird to lock in juiciness and turned drippings into savory gravy. Now, you’re ready to serve a delicious, oil-less fried turkey that’s tender, flavorful, and perfectly cooked.
Keep these steps in mind, follow them closely, and enjoy every unforgettable bite.